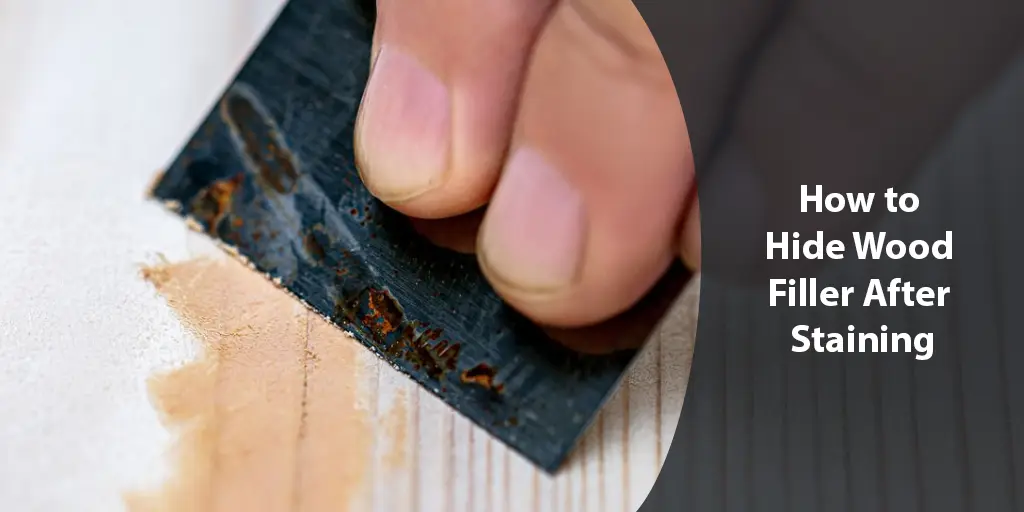
Wood filler is a versatile and essential material for woodworkers. It allows us to carefully repair cracks, dents or holes in wood surfaces without compromising the natural aesthetics.
However, after applying stain it can be challenging to blend the filler seamlessly into the surrounding grain. With the right techniques, you can hide wood filler after staining so it looks completely natural.

In this comprehensive guide, we’ll break down the full process step-by-step using tried-and-true methods. We’ll start with the fundamentals of wood filler and how staining enhances wood.
You’ll learn why proper preparation is key, from selecting the correct filler type to preparing surfaces.
Then we’ll cover techniques for perfect color-matching and application. I’ll also share insider tips for blending filler during the stain process using multiple thin coats.
Troubleshooting is part of any project, so we’ll review common challenges and solutions. Regular maintenance helps protect your work too.
We’ve also included the latest innovations in wood fillers and stains. By following these strategies, you can achieve flawless, long-lasting results that maintain the wood’s natural beauty.
Whether you’re a beginner or seasoned DIYer, let’s dive into the details to help you hide filler like a pro. I aim to empower you with clear, confident guidance utilizing my extensive woodworking experience.
Preparation
The key to hiding wood filler starts with proper preparation. First, make sure to choose the right type of filler for your project
Solvent-based fillers are best for outdoor applications but can yellow over time, while water-based ones are more rigid and paintable if needed. I recommend considering the environment and your planned finish coat.
Accurately matching filler color to wood grain is also important. Compare samples against your lights and darks to get a duplicative match. Sanding the filler smooth after application is much easier if the tones complement rather than contrast with the wood.
Careful surface preparation further helps filler adhesion and appearance after staining. Use a cleaning solvent to remove any dirt, grease or previous finishes from the wood.
This allows the filler and stain to bond fully with the grain. Then sand the entire area you will be filling, not just the gaps, with 150-grit sandpaper for a uniform texture.
Taking time at this stage pays off downstream. A clean, smooth surface accepts filler easily and eliminates texture contrasts after stain is applied.
Follow these preparation fundamentals and your wood grain will skillfully disguise any filled areas later on. Let me know if you have any other questions as you make your filler and staining selections for a result you can feel confident about.
Application
Now it’s time to apply the filler. First, select a type that is easy to work with and provides enough time for precision coloring and shaping.
Firm-setting two-part epoxies are great for deep gaps but have a short working time, so stick with all-purpose wood fillers for most repairs.
An essential coloring technique is “toning” – lightly brushing filler into the wood grain with a clean brush. This helps it blend seamlessly rather than sticking out in pixelated patches.
Go slowly and build up layers until you achieve a homogenous look. Adding a touch of stain to the filler itself can also help it mirror surrounding colors.
Once ready, apply the filler firmly into cracks and sand smooth with a flat block. Level it just flush or slightly below the wood surface, as staining may darken filler slightly. Use these insider tips to skillfully fill and shape without sanding through.
Allow full drying time, typically 24 hours. Then lightly resand with 150 or 220-grit paper so the grain matches filled and unfilled areas equally. Your preparative work will now pay off with a surface that requires minimal additional sanding.
Follow these clear application steps and your filler will flawlessly disappear during staining.
Blending Filler and Stain
While filler preparation laid the groundwork, your ability to meld it seamlessly with stain takes real finesse. But fear not – these techniques will have your filled areas blending invisibly.
Our multi-coat approach is key. But first, let’s review stain selection best suited to your wood species and desired look. Feel empowered to choose with confidence based on project needs.
Focus on seamless filler coverage without harsh edges. Gently brush excess stain into repairs on that initial coat before wiping away excess from the whole surface.
As additional thin coats are meticulously applied, packed toner absorbs stain at the same rate as surrounding grain. Keep brushing stain into filled sections for photo-perfect matching.
Some find a touch of stain added directly into the filler before the first full coat also helps. See what blending methods work best for your eye and style.
Have patience – it takes time but consistency pays off richly. Sanding between coats isn’t needed if application is even.
With practice, filled areas will disappear like magic. But don’t hesitate to reach out for guidance ensuring flawlessness. Together, we’ll take your skills to the next level so you can relax, confident your work is beautifully complete.
Problem Solving
Even the most experienced woodworkers encounter issues, so don’t hesitate to troubleshoot confidently. Let’s review the most common challenges and solutions together.
If filler pores or cracks reappear, the surface likely wasn’t perfectly clean. Stay calm – just resand and refill, then carefully re-stain following proper prep.
Bumpy filler indicates insufficient smoothing. Take a deep breath and resand until flush, then re-stain to blend seamlessly.
Cloudy filler or stain could mean incompatible products. Don’t worry – strip, restart with recommended pairs, and you’ll succeed.
Uneven stain absorption may arise from inconsistent sanding or application techniques. Simply use 0000 steel wool to level it out, then recoat methodically.
Large gaps demand specialized handling like spline inserts or mending. Reach out – I’m here to calmly walk through tailored solutions.
Challenges will come, but you have the knowledgeable tools and even temper to address them. Remember – issues simply provide opportunities to refine our skills.
Feel empowered knowing helpful guidance stands by your side. Now let’s continue our work with confidence, competence and care. The learning never ends, and that’s what makes this craft rewarding.
Maintenance
While beautiful upon completion, woodworking deserves ongoing care to retain that luster for years to come. Regular maintenance allows you to feel confident your work will stand the test of time.
Lightly dust filled surfaces regularly using a soft cotton cloth to prevent dirt particles from compromising the finish over many uses.
For light cleaning, mix a solution of wood soap and water in a spray bottle. Gently wipe surfaces with the grain and dry swiftly to retain protection.
Minor nicks or scratches may arise from daily wear. Have no fear – guidance is here. Lightly sand affected areas with fine-grit paper and confidently blend in touch-up stain.
Take pride in your craft through preventative upkeep rather than intensive restoration later. Feel empowered to assess when issues arise, addressing them capably before they worsen.
Should problems persist, don’t hesitate to bring in a pro. Their expertise ensures lasting beauty. Together, we’ll keep your skills and works honed for generations of enjoyment. Onward and upward!
By caring and making needed repairs ourselves, our work endures gracefully through the years. Stay equipped and all will continue serving with the high quality you envisioned. Confidence is earned through diligent maintenance.
Recent Advances
Our craft continuously progresses as new needs arise. Staying knowledgeable about recent innovations empowers confident choices for any upcoming projects.
Advances in filler formulations deliver remarkable accuracy. Water-based varieties can now seamlessly blend any stain. Hybrid options provide the handling of water-based with the yellowing resistance of solvent-based.
Nanotechnology also impacts stains. New scratch-resistant clear coats bond protection to stain pigments for excellent durability indoors or out. Tints provide enhanced grain definition without obscuring repairs underneath.
Even specialized products arrive. Filler pens precisely touch up tiny blemishes. Spray stains neatly tint large surface areas. Pigment sealants forever set color for later refinishing.
As technologies evolve, trust your instincts and hands-on experience to select optimal modern solutions. Feel assured you have the discernment to implement advances successfully or stick to proven methods.
Stay informed through reputable sources and let your skills adapt smoothly. Progress strengthens our craft when guided by a watchful eye, steady hand and calm discernment. Seek wisdom openly while retaining confidence in your nuanced abilities.
Conclusion
Through understanding theory and guided practice, we’ve covered clear strategies enabling confidence and control over even the most imperceptible repairs.
Feel empowered taking these principles forward and adapting them smoothly to new situations.
Let’s review the tried-and-true fundamentals ensuring wood filler disappears seamlessly each use:
- Complete preparation is the non-negotiable foundation.
- Methodical application and smoothing strains skills.
- Multi-coat staining capably blends our work.
- Troubleshooting challenges maintains growth.
- Preventive maintenance underscores craftsmanship.
- Informed selections capitalize on innovation.
With diligence, mastery arises. Soon filled interventions require but a subtle glance to detect. Retain level-headedness and technical nuance will come through experience.


