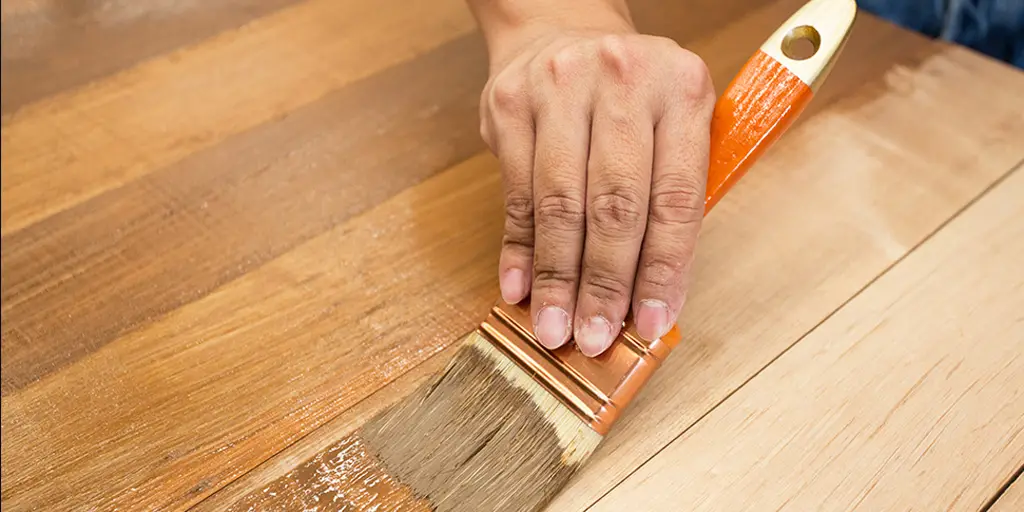
Whether you’re refinishing a furniture piece or finishing a wood flooring project, polyurethane is an indispensable finishing material.
However, even experienced woodworkers can encounter issues like bubbles, drips or an uneven sheen when applying polyurethane. If left unaddressed, these mistakes can detract from an otherwise beautiful finished surface.

Luckily, most polyurethane problems have straightforward fixes. In this guide, we’ll break down the common mistakes that occur and share our proven techniques for fixing them. But prevention is always better than cure, so we’ll also explain how to avoid issues in the first place.
Before diving into specific remedies, it’s important to evaluate the type and severity of the problem carefully. Factors like the material, environment and desired look will influence your approach.
Our experts have worked with thousands of unique projects over the years and can advise you on choosing the most suitable solution.
With the right tools, materials and techniques, even major refinishing disasters can be salvaged. We’ll cover fundamental tools, safety gear and how to properly prep surfaces. You’ll also find recommendations for high-quality polyurethane brands to ensure long-lasting results.
By the end, you’ll have confidence in your ability to troubleshoot any polyurethane mishap. Consider this guide your polyurethane problem-solving handbook.
Let’s get started on mastering mistake fixes and creating beautiful finishes you can be proud of
Tools and Safety
The proper tools are essential for any woodworking or refinishing project. When fixing polyurethane mistakes, a few select pieces of equipment can make all the difference.
Every woodworker’s toolkit should include good-quality sandpaper in a range of grits. You’ll use these to carefully repair imperfections. Invest in a random orbital sander for fast, even sanding of large surfaces.
For targeted work, keep retailer-grade sanding blocks and sponges on hand. A metal paint scraper removes excess polyurethane without damaging the wood below. Tack cloths wipe away dust before reapplying coats.
Safety should always be the top priority. Ventilate the work area well with fans and open windows. To prevent lung irritation, wear a respirator rated for oil-based paint fumes.
Opt for latex or nitrile gloves to protect your skin from irritating substances. Consider safety glasses too for jobs like sanding or scraping. Be mindful of any sparks or open flame near polyurethane vapors.
Proper ventilation is critical for health as well as finishes. Ensure the area is dust-free before polyurethane cures. With the right gear protecting you, you’ll feel confident tackling even complex fixes. Your wellbeing and results are worth the small investment.
Materials
For durable, long-lasting results, select a high-performance polyurethane. Look for reputable brands with a history of superior finishes and robust technical support.
Some top options trusted by professionals include Bona, Minwax and Varathane premium water-based or oil-based polyurethanes. Carefully read labels to choose the sheen and formula best for your project needs.
When refinishing, you may need to build up multiple thin coats for full coverage rather than one thick layer. Stick with the same product line for best adhesion between coats.
Keep acetone or denatured alcohol on hand for cleanup and to thin polyurethane if needed. Consider adding a small amount of tint when blending or repairing color differences for a seamless match.
Sandpapers, prep cloths and proper ventilation equipment are necessities, but the polyurethane itself is arguably most important of all. With the right material from a proven brand, your final results will meet the highest standards of durability, protective qualities and visual appeal. Let’s explore application techniques next.
Sanding Techniques
Whether you need to remove a few brush strokes or fully strip back to bare wood, sanding techniques are fundamental to polyurethane refinishing. With the right approach, you can seamlessly repair nearly any imperfection.
Always sand with the grain to avoid undesirable swirls. Start with coarser grits like 80-100 grit to remove bulk material quickly. Progress through finer100-150, then 180-220 grits for smoothing.
Use a random orbital sander for large, flat areas and sanding blocks for edges, curves and detailed work. Apply even pressure and don’t overwork any spots.
For light scuffs, a 220-320 grit sponge may be all that’s needed. Stick to dry sanding until the final pass; then tack cloth away dust for a smooth surface.
Full-scale stripping requires more robust 80-120 grit sanding until the old finish is completely erased. A paint scraper also helps here.
With diligent sanding technique, you can blend patches seamlessly into the surrounding area until imperfections disappear. Take your time – rash sanding could lead to undesirable results.
Proper sanding technique is at the core of any polyurethane refinishing job. Follow our best practices for uniformly prepping surfaces before applying a flawless new finish.
Stripping Techniques
On some projects, the old finish may be too far gone to salvage, requiring a full stripping down to bare wood. Our techniques will efficiently remove multiple failed coats.
For light-duty stripping, start with 180-220 grit sanding and a chemical stripper according to label instructions. Check regularly and reapply as needed. Scraping aids with stripper residue.
With persistent old polyurethane, you may require a more aggressive approach. 80-120 grit sanding can make quick work of this. Follow with a reliable peel-away or methylene chloride-based stripper.
Apply generously per product directions, blanket the surface, and allow full dwell time to soften layers. Safety gear is mandatory with harsh strippers.
Scrape off softened residues with a paint scraper or putty knife. Reapply stripper to remaining areas as needed. Progressively finer sanding removes remnants for a smooth base.
Thoroughly wash, then sand between 80-120 grit to degrease. A final 180+ grit pass evens out scratch marks.
Stripping down to bare wood may seem daunting but with the right products and techniques, you’ll have a clean foundation to build a beautiful new polyurethane finish.
Correcting an Uneven Finish
One of the most common mistakes is an inconsistent sheen caused by imperfect application. But you can remedy this with strategic sanding and re-coating.
Unevenness often arises from insufficient roller spreading, excess material left in recessed grain, or multiple thin coats instead of two thicker ones.
Begin by assessing which areas need leveling. Use a medium grit sandpaper to scuff high spots and leaving lows intact. Work in the direction of the wood grain.
For major unevenness over large areas, switch to a palm sander to speed up this step. Be careful not to sand through to bare wood.
Once sanded flat, use a high quality tack cloth to remove all particles. Inspect closely under bright light; re-sand any remaining highs as needed.
Apply a generous new coat of polyurethane using proper rolling technique with an appropriately loaded roller. Level with the grain for balanced coverage.
Let dry fully then inspect. Add another coat if required to fill in low spots for an ultra-smooth surface. Two uniform topcoats will leave your project with an exquisite flat finish.
With some light sanding expertise and patience during re-application, you can attain flawless results after an uneven startup. Your refinished surface will have showroom sheen.
Repairing Bubbles and Blisters
Bubbles and blisters marring an otherwise smooth finish can be disappointingly noticeable. But don’t worry – with the right methods, they can be easily popped and the area blended away.
These defects often stem from trapped air or moisture under newly applied polyurethane. Ensure surfaces are clean, dry and at the appropriate application temperature to avoid future issues.
To repair existing bubbles, first determine if they are under or atop the surface. Use a pin or x-acto knife to carefully slack the topskin without rupturing underlying layers.
For bubbles below the topcoat, gently prick with a pin and press out the air pocket. Take care not to tear the surrounding material.
Mix a small batch of the same polyurethane used originally, thin it slightly with solvent, and use a disposable brush to paint over popped areas.
Level it flush and let harden fully. Then fine sand gently and reseal if needed for an invisible fix. Nearby ripples can also be blended out this way.
With a light touch and proper technique, you can make these blemishes disappear to achieve mirror-like perfection. No one will ever know repairs were made.
Correcting Brush/Roller Marks
No matter one’s experience, it’s easy to leave unsightly brush or roller textures behind. But these marks respond well to careful sanding and proper application adjustments.
First, use a fine (220+) grit sandpaper to lightly scuff affected areas in the direction of the grain. Focus only on textures, not removing material.
For large spans, a finishing sander makes quick work. Inspect under lights; resand any lingering marks until the surface is silky smooth.
Next, review your application technique. Ensure the roller is not overloaded with polyurethane. Use light, even strokes at a 90 degree angle to the surface.
Brush in painting motions on open-pored woods for a beautiful satin sheen. Avoid excess backbrushing which can slicken textures.
To retry the surface, thin your polyurethane 5-10% with denatured alcohol. Fewer coats applied thinly produce professional results.
With sanding expertise and dialed-in technique, you’ll eliminate all traces of application irregularities for a pristine finish every time.
Removing Drips and Runs
No one wants to see unsightly drips or runs marring their beautiful wood surfaces. With the right remedial techniques, they can disappear without a trace.
Polyurethane drips typically occur from overloading brush bristles or applying unevenly on vertical sections. Heat and improper technique on horizontals may cause runs.
For small drips, gently scrape away excess material with a sharp blade or putty knife. Work carefully to avoid gouging the wood underneath.
On larger runs, start by using a 180-220 grit sandpaper to feather out edges. This prevents visible lines when you make repairs.
Apply a small amount of fresh, thinned polyurethane to the sanded area with a disposable brush. Level it out and allow drying.
Repeat sanding and re-coating steps if needed, feathering the edges wider each time for an invisible blend. Do not overwork the patch.
With removed drips fully cured, return for a final light 180+ grit sanding and topcoat application across the whole surface for coherence.
By taking your time removing drips precisely, your project will show that professional grade quality both you and your clients will appreciate.
Buffing Out Surface Damage
No matter how careful we are, scratches, scuffs and blemishes do occur over time. But often minor surface damage can be easily improved.
First, assess the severity of each mark. Very light scratches may simply require buffing with a fine 0000 steel wool or high grit sandpaper.
For buffing, sweep back and forth with the grain using minimal pressure. This abrades high spots to blend away hairline marks. Change areas frequently.
If scratches are deep but contained, first flatten their base with 180-220 grit paper. Then blend outward using successively finer grits up to 320.
Should the scratch penetrate fully, filling may be needed. Mix your polyurethane brand with a touch of wood filler. Apply into defects and level flush.
Allow drying and then sand smooth. For larger gouges, you may need to do multiple filling/sanding cycles.
Once fully addressed, apply the appropriate number of topcoats to restore protection. Before long, blemishes will vanish as if they never existed at all.
With the right restoration approach, you can return even damaged surfaces to like-new condition and keep treasured woods looking their best for years to come.
Blending Color Differences
Despite our best efforts, inconsistent coloring sometimes occurs when refinishing. But with the proper techniques, you can seamlessly blend patches into surrounding areas.
First, determine the cause of any variation. Is it from age, uneven sanding, or an incompatible stain or polyurethane? Accurately matching is key.
For small spots, lightly sand the patch and surrounding wood with 220-320 grit paper to slightly lighten or darken as needed.
Mix staining glaze or gel stain to tweak the tone of filled areas before multiple topcoats. Apply in thin, even layers, blending 4-6” beyond edges.
Larger repairs may require selective darkening of the whole surface for equilibrium. Test stain mixtures on scraps until achieving uniformity.
As a last resort, try tinting fresh polyurethane with universal or furniture coloring products. Apply with a small brush in thin layers, feathering out.
With diligent prepping, test matches, and gradated applications, even significant color mismatches can disappear seamlessly into the surrounding area. Your surface will have flawless visual flow and appeal.
Enhancing Adhesion
While most polyurethane adheres well, poor bonding can occur when surfaces are insufficiently prepared or due to characteristics like high moisture content. Address issues at the root.
First, determine the cause of inadequate adhesion. Is the wood excessively smooth, oily, or saturated? These scenarios require modified prep work.
Start by rigorously sanding with an appropriate grit like 120-150 to actively scratch the wood substrate. This microroughens for better mechanical keying.
Thoroughly vacuum and tack cloth away all particles. Consider a light scuff-sand of previous polyurethane layers too for superior surface bonding.
For unwind or moisture issues, let wood fully acclimate and dry before refinishing. A moisture meter confirms safe continuing ranges.
On difficult substrates, try a bonding primer between the wood and topcoats. Follow package instructions precisely.
For small retouching, add just a drop of household ammonia per ounce of polyurethane. The chemical supports robust adhesion development.
With a sound strategy to enhance adhesion at its foundation, your polyurethane masterpiece will last for years under even harsh conditions.
Smoothing Overlaps and Streaks
Overlapped or inconsistent polyurethane application can mire an otherwise flawless finish. But with the proper blending techniques, these errors vanish smoothly.
Overlaps often arise from rushing applications or failures to maintain a wet edge. Uneven streaking stems from improper roller distribution or lap marks left between coats.
Begin by assessing the issue extent and determining the best remedy – fine-grit sanding, or removal and recoating of affected regions.
For sanding, use a high-quality papers like 220-320 grit to gently level overlaps. Feather edges at least 4 inches beyond for a clean blend.
In rooms with large variances, focus on just bringing overlapping areas level before reapplication. Two uniform coats will even out the rest.
On streaky sections, a light 120-150 grit sand removes inconsistencies. Then thoroughly tack before laying down a fresh, properly-applied topcoat.
Small lap areas can be sanded and brushed with a tissue-thin topcoat, dragging beyond borders. Allow curing and check for perfection.
With careful smoothing and recoating imperfections, your project’s finish will exemplify professional quality from start to end.
Restoring Shine and Gloss
Nothing makes a space look quite as polished as a high-gloss sheen. Whether your luster has dulled or you want killer reflected light, bring back that showroom brightness.
First, determine if the topcoats merely need freshening, or if deeper surface scratches demand filling. Select the right polishing system accordingly.
For general cleaning and buffing of sound finishes, use a mechanical or electric buffer with white or green polishing pads in slow, overlapping motions.
Work in small sections to avoid overheating. Maintain even pressure as swirls disappear in glossy reflection. Change pads frequently.
Deeper abrasions require filling first. Mix polyurethane with powdered pumice or rottenstone to make a paste. Rub in and level smooth.
Sand lightly with 220-320 grit and reapply until flawless. Then start your buffing process for a mirroredtransformation.
Hand-rubbing with maroon or blue pads produces showroom shine too for smaller areas. Arm yourself with the proper methods and products to restore any surface’s luster.
Salvaging a Failed Project
Even experienced refinishers encounter finish failures now and then. Through no fault of your own, conditions may overwhelm initial attempts.
But don’t give up – with assessment and the right approach, failures can often be remedied. First, determine the nature of the problem.
Peeling or de-lamination signifies moisture or adhesion issues. These may require a full sand-back and re-application from scratch.
Additionally, full stripping is recommended for compromised integrity from excessive marring, crazing or cracking of previous topcoats.
However, some failures like discoloration or minor damage may respond well to selective repair techniques rather than stripping the whole surface.
Sand carefully the affected areas at the first signs of trouble to prepare for recoating. Thorough drying is also critical.
With stripped or sanded patches, aim to seamlessly blend new application into existing with gradual grits and proper technique.
By methodically analyzing what went wrong and selectively addressing problematic regions, even the most egregious starting points can be rehabilitated. Your finished project will shine once more.
With determination and solid refinishing acumen, there’s no perfection you can’t rescue. So don’t abandon ship – keep sailing toward beautifully restored results.
FAQs
This section addresses some of the most common questions people have about polyurethane projects:
What is the drying time for polyurethane?
Drying varies depending on product, film thickness and conditions but most polyurethanes dry fully within 24-72 hours and can be lightly used after 1-3 days.
Can polyurethane be applied over existing polyurethane?
Yes, provided previous coats are well-adhered, sanded lightly and properly cleaned. Best results come from using the same brand for compatibility.
How many coats of polyurethane are recommended for a durable finish?
For high traffic surfaces, plan for 3-4 coats minimum, with 24 hour minimum drying between each. Less-used items may only require 2 coats.
What is the best way to clean polyurethane brushes and tools?
Immerse in denatured alcohol or paint thinner as soon as possible for easier cleaning. Wash brush until rinse water runs clear.
Can I apply polyurethane over stained wood?
Yes, polyurethane works well over most stains once dried fully. Test a small area first for compatibility or blotchiness issues.
How long will a polyurethane finish last?
With proper application and care, polyurethane can protect wood for 5-15+ years indoors before needing recoat. Outdoor longevity depends on climate and sunlight exposure.
How does water-based polyurethane compare to oil-based?
Water-based dries faster but offers slightly less durability. It cleans up easily with water and emits lower VOCs. Oil provides a harder finish indoors long-term.
How do I repair polyurethane that has turned white or cloudy?
Light sanding and recoating with fresh polyurethane restores clarity. Moisture intrusion requires identification and rectification.
Avoiding Future Mistakes
While any project can involve hiccups, applying fundamental best practices will set you up for success from the start:
Begin by thoroughly cleaning and degreasing surfaces. Make sure wood is fully acclimated, smooth (120-150 grit) and dry.
Use a high-quality polyurethane suited for your specific project needs. Read all labels and instructions carefully.
Apply in a well-ventilated area free of dust with decent ambient conditions (~70°F). Use good lighting to check for defects.
For wood floors, protect from foot traffic, dust and moisture during and after application as directed.
Use proper application tools and techniques for your chosen finish. Keep a wet edge and overlap well during coating.
Apply thin, even coats with the grain, minimizing pooling. Allow full drying between coats as instructed.
Lightly sand each coat with 220-320 grit to enhance adhesion before reapplying. Clean and tack thoroughly.
Inspect closely during and after application for errors. Address immediately per pro methods outlined.
By focusing on solid preparation and following manufacturer guidance to the letter, your polyurethane application success is assured.
Summary and Key Takeaways
We’ve covered a range of foolproof techniques for addressing common polyurethane mistakes. Let’s recap the most vital lessons:
Properly prep all surfaces by thoroughly cleaning, smoothing and drying before application. This prevents many issues outright.
Invest in high-quality water-based or oil-based polyurethane from reputable brands for maximum durability and protection.
Follow label directions exactly regarding conditions, application methods, drying times and coats required.
Use the appropriate tools – orbital sander, drywall screens, brushes and rollers – for your project needs.
Develop sanding skills to smoothly repair imperfections from solvent popping, blending patches or correcting defects.
Consider ventilation, safety gear and handling practices to protect yourself when refinishing.
Know when to fully strip back versus selective repairing of failures from moisture, adhesion woes or other damage.
With patience and the proper approach, there’s no polyurethane problem you can’t repair. We hope this guide leaves you feeling equipped and confident to take on any future project! Thank you for reading.
Additional Resources
For continued learning on wood refinishing and polyurethane, consider exploring these top additional resources:
Websites:
The Family Handyman – Handy guides and forum for general woodworking questions
Fine Homebuilding – In-depth articles from industry experts on various refinishing topics
Bob Vila – Large archive of easy-to-follow tutorial videos and project plans
YouTube Channels:
Minwax Wood Finishing – Demonstration videos on proper use of Minwax products
HomeRepairTutor – Practical guidance on fixing common wood flaws and injuries
Woodwork Web – Helpful insight into technique from a Master woodworker
Books:
The Complete Book of Wood Finishing by Jerry Apps – Comprehensive reference
Step-by-Step Finishing Techniques by Bob Flexner – Great visual instruction
Paint and Coatings: Testing Manual by Hempel – Technical specs for pros
Online Courses:
Udemy Wood Finishing Fundamentals – Affordable course from experienced trainer
Craftsy Wood Finishing Made Easy – Video series on full polyurethane projects
We hope these top extra resources help expand your knowledge and woodworking skills. Keep practicing and good luck with future projects!
Conclusion
With patience and practice of these techniques, you can confidently take on any polyurethane mishap that comes your way. Remember – a mistake simply presents an opportunity to improve. Refine your skills over time and you’ll be amazed by what you can salvage or create.
We hope this guide has equipped you with a complete toolkit for any refinishing scenario. Whether it’s buffing out minor scuffs or rescuing an entire failed project, apply careful assessment and the proper remedy for success.
Don’t be afraid to experiment on scraps as you build expertise. And know that we’re always here as a helpful resource should questions arise. A beautiful, protected finish is within reach, even after problems strike.
Most of all, take pride in every refinished surface you restore to showroom condition. With perseverance and craftsmanship, imperfect pieces have potential to become family heirlooms. We wish you the great satisfaction of transformative woodworking magic.
Now it’s time to get out there and put these skills to work. Guaranteed, any eyesores you remedy through meticulous refinishing will become shining examples of your dedication. We can’t wait to see pictures of your restored hardwood glory! Happy refinishing.


