The ancient craft of wood carving has been practiced for millennia, dating back at least 30,000 years to the Upper Paleolithic era.
Hunter-gatherers of the time shaped wood into tools, art, and religious symbols, establishing wood carving as a core expression of human creativity.
For centuries, wood carving flourished, decorating Gothic cathedrals and furnishings with ornate figures of humans, animals, and plants.
Today, wood carvers continue this tradition while forging their own modern interpretations, pursuing intricate details or expressive abstractions.
By working directly with natural materials, wood carvers tap into a meditative mental zone that unleashes creativity.
The selection of the right tool for the task at hand, the feel of the wood under the cutting edge, and the focus needed to slowly reveal shapes and textures—these aspects of wood carving allow carvers to escape into a world of Zen-like calm and profound connection with nature.
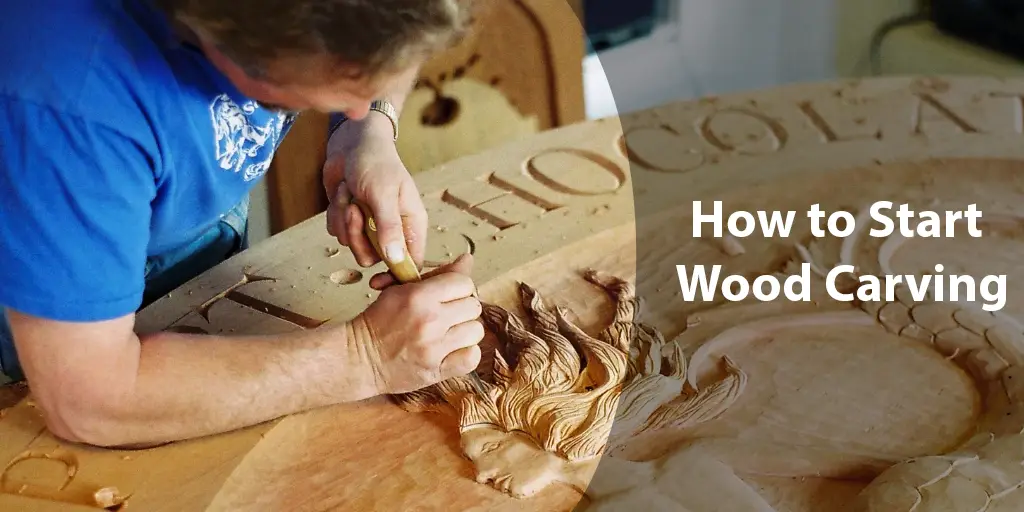
For those just beginning the journey of wood carving, this guide provides a grounding in the essentials.
With the proper tools, techniques and safety precautions, even a complete beginner can find early success through simple projects that build confidence and skill.
And with practice and persistence over time, carvers develop an intuitive sense of the materials that allows for ever-more complex and beautiful creations.
This ancient craft offers much to the beginner: mental relaxation through careful focus, increased dexterity and coordination, an outlet for creativity untethered from the virtual world.
By following the steps outlined here, you can discover for yourself the timeless pleasures and mental benefits that wood carving continues to provide.
And who knows – you may eventually join the ranks of craftspeople who carry on this most human of traditions.
What is Wood Carving?
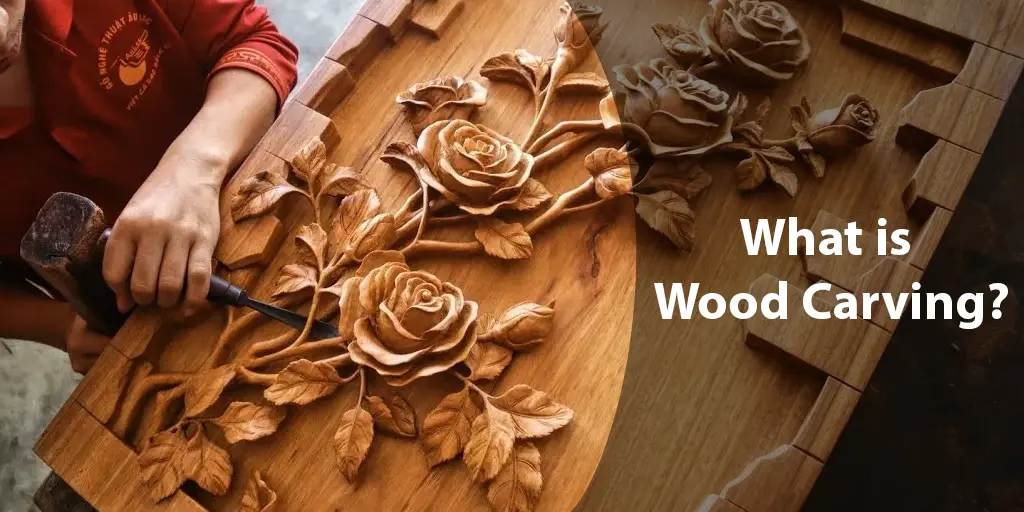
At its essence, wood carving is a simple idea, shaping wood creatively through the deliberate removal of material using hand tools.
But like all art forms that utilize simple tools and natural materials, wood carving has evolved into an expressive medium that reflects the full breadth of human experience.
The basics are straightforward. Carvers utilize knives, chisels and gouges to pare away unwanted wood, revealing shapes, textures and details within the material itself.
Rather than employing molds or casts, wood carvers sculpt directly onto the natural wood – logs, planks and blocks.
The earliest examples of wood carving date back over 30,000 years to the Upper Paleolithic era.
Since then, carvers in cultures around the world have developed distinct styles that reflect their unique traditions, aesthetics and worldviews.
Some techniques focus on relief, where designs protrude from or are inset into a flat background.
Others produce three-dimensional forms suitable for ornaments, figurines and bowls. Whittling carves away slices of wood in a simple subtractive fashion.
Whatever the object or style, the principles remain the same, selecting tools that complement the technique and material, choosing wood with suitable grain and hardness, and taking safety precautions to minimize risk.
With patience and persistence, even complete beginners can gain satisfaction and success through simple projects that build confidence and skill.
Over time, with increasing mastery of technique and sensitivity to the material, wood carvers enter a meditative creative zone where art emerges naturally from the wood itself –
revealing shapes, textures and details that speak to something shared and universal within the human experience.
Benefits of Wood Carving
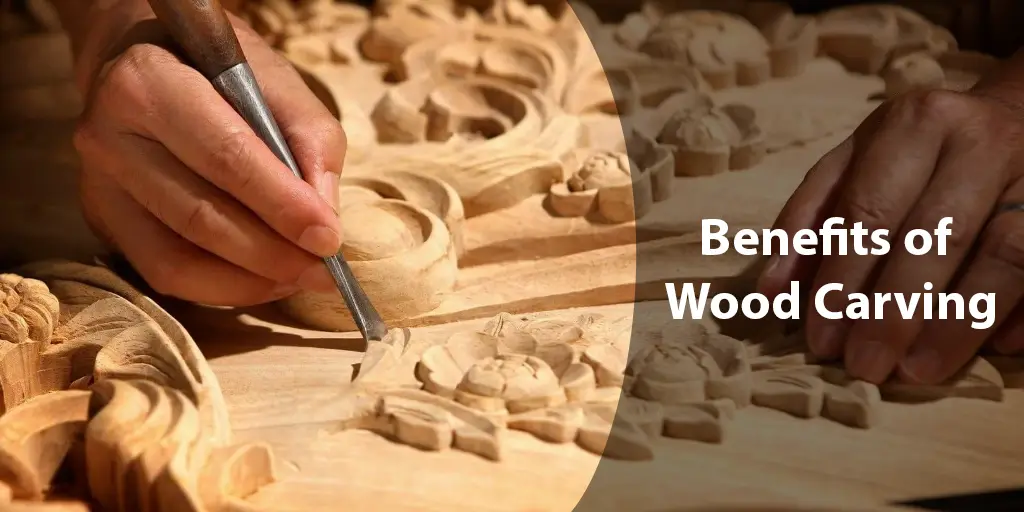
Wood carving offers numerous advantages for both mental and physical health. Carefully removing wood with sharp tools requires patience, focus and attention to detail – all of which produce stress relief and a meditative state of mind.
Mental Health Benefits
Stress Relief
The rhythmic, repetitive movements of carving combined with focusing intently on the wood helps release tension and anxiety. Many carvers report feeling calmer and more relaxed after carving.
Creativity Boost
The unstructured, free-form nature of wood carving helps unlock creative thoughts and solutions by giving the mind space away from normal constraints. This can also increase productivity in other areas of life.
Improved Focus and Concentration
Maintaining focus on the task at hand and monitoring subtle changes in the wood as you carve strengthens mental focus and the ability to concentrate for long periods.
Physical Health Benefits
Fine Motor Skill Development
The precise knife and gouge strokes used in wood carving help enhance dexterity and fingering ability by engaging small hand muscles.
Hand Strength and Dexterity
The prolonged use of wood carving tools results in increased grip strength, range of motion and coordination of the hands and fingers over time.
Eye-Hand Coordination
Constantly observing and adjusting to what you uncover in the wood as you carve improves the communication between the eyes and hands, aiding in tasks that require seeing and doing simultaneously.
With regular practice, the mental and physical benefits of wood carving can make a meaningful impact on quality of life.
So pick up your tools, turn off distractions and feel the stress melt away as you connect with the natural rhythms of the wood – one mindful shaving at a time.
Essential Tools for Wood Carving
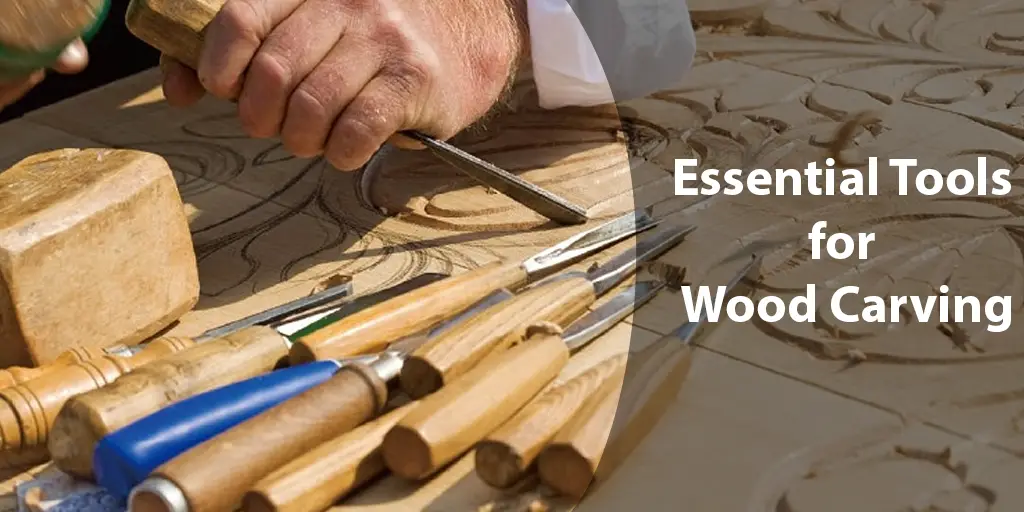
The right tools are essential for successful wood carving. Beginners need at least a few basic types to get started:
Knives
A quality wood carving knife is your main tool. A general purpose #5 or #6 knife will handle most jobs. Knives with curved or straight blades are available. Benefits of each:
- Curved blades help guide the knife to follow wood’s grain
- Straight blades offer more surface area for slicing and chopping cuts
Choose quality steel that keeps an edge. Beginner sets with multiple blades and handles are great for experimenting.
Gouges
These U-shaped tools remove wood in curves and hollows. Available in varying widths, from 1/16 to 3/4 inch. The shape guides the cut so you can focus on applying even pressure. Start with U-shaped gouges in asstd. sizes to practice basic rounding and forming.
Mallet
A wooden mallet gently loosens wood fibers to ease knife and gouge cutting action. Plastic mallets reduce vibrations transmitted to the workpiece. Choose a mallet sized appropriately for your projects.
Other useful tools: vises to securely hold the wood, chisels for straight cuts, and abrasives to smooth surfaces. Beginner sets with knives, gouges, mallets and abrasives offer great value.
Factors for Choosing Quality Tools:
Blade Steel
High carbon steel takes/holds an edge. Stainless steel resists corrosion but is harder to sharpen.
Handle Material
Wood handles provide cushioning while plastic is lightweight. Grip shape affects comfort.
Blade Thickness
Thicker blades provide strength but less precision. Balance thickness with your skill level.
With a few basic wood carving knives, gouges and mallets, even beginners can start practicing fundamental techniques on small projects.
As your skills progress over time, invest in higher quality tools to match – and push – your evolving abilities. But the journey begins with picking up your first knife and making that first cut. The rest you’ll figure out along the way.
Read Also: How to Flatten Warped Plywood
Basic Techniques
Mastering a few fundamental wood carving techniques gets you started on the right track. Three techniques to focus on as a beginner:
Relief Carving
In relief carving, your design stands proud from or is recessed into a flat surface.
You remove background wood to highlight your design.
Start by outlining the design with knife cuts. Then remove wood between outlines using knives and gouges. Work from the background outwards.
Use a mallot to gently tap gouges for even cuts. Take thin layers of wood, checking often. Focus on shapes and simple textures first.
Practice reliefs on plaques or frames to hone this versatile carving technique.
Whittling
Whittling is the simple, intuitive act of carving shavings from a piece of wood with a knife.
Hold the knife at a shallow angle and make slicing cuts with the grain in long strokes. Twist the blade to release shavings.
Change your knife angle to carve across the grain for detailed work.
Whittle on small sticks or dowels to start. Shape simple forms like spoons and utensils. Over time, experiment free-form to explore your whittling creativity.
Round Carving
Creating 3D objects requires extra care to Carve evenly in all directions.
Start with simple round or oval forms. Use knives to define the form’s outline.
Use multiple gouges and chamfer bits to hollow out waste wood between outlines.
Work in stages, checking your progress often. Remove 10-20% of the wood in each stage.
Once the basic shape emerges, refine details with smaller tools.
Practice on turning blanks or basswood blocks. Carve simple forms like spheres and discs to develop patience and precision.
With dedication and regular practice of relief, whittling and round carving techniques, even beginners can steadily progress their wood carving skills and confidence over time.
Focus on the fundamental movements and let your motivation grow freely from there.
Selecting the Right Wood
The wood you choose has a huge impact on your carving results and enjoyment. For beginners, focus on the following factors:
Grain
Straight-grained wood with minimal knots is best. Check the end grain for a consistent pattern without swirls.
Hardness
Softer woods like basswood and butternut carve easiest. Avoid hardwoods like oak and maple initially.
Stability
Check for cracks,cups or warping. Stable wood produces more consistent results.
Size
Start with smaller blocks and plaques to build confidence. Avoid large pieces that feel overwhelming.
Cost
Inexpensive woods give you freedom to practice techniques and make mistakes.
Based on these factors, good beginner woods include:
Basswood
An excellent starter wood. Straight fine grain carves easily in any direction. Inexpensive.
Butternut
Soft and lightweight. Carves nearly as easy as basswood but with more subtle grain patterns.
Pine
Inexpensive and readily available. Soft and sappy, requiring frequent oiling. Useful for whittling.
Poplar
A hardwood option. Straight fine grain cuts easily. More challenging than basswood.
As your skills develop and you crave more detailed grain, try:
Cherry
Moderately hard. Features distinctive swirls and dots in the grain. Great for ornaments.
Walnut
A beautiful hardwood. Features dramatic contrasts in dark/light grain. Challenging to carve but very rewarding.
Wood carving is as much about developing a sense for the material as acquiring technical mastery. Choosing suitable woods to match your skill level allows you to focus on technique while also feeling the inherent qualities of the wood through your tools.
Over time, you’ll develop an intuitive relationship with various woods that opens up greater creative possibilities. But it starts by selecting the right wood for where you are now.
Safety Measures
When using sharp knives and chisels, safety should be your top priority as a wood carver. Follow these precautions to minimize risks:
Protective Gear
Gloves
Essential for protecting hands from cuts, scrapes and splinters. Leather palm gloves allow most sensation while heavier duty cut-resistant gloves protect against accidental knife slips.
Eye Protection
Safety glasses with side shields or goggles prevent wood chips and objects from hitting your eyes. Look for ANSI Z87.1 certification.
Ear Protection
Optional but recommended. Muff-styleearplugs or earmuffs reduce noise from cutting, sanding and hammering.
Dust Mask
A simple disposable dusk mask filters out fine wood particles produced during carving, sanding and finishing.
Work Clothes
Loose, long-sleeved shirts and long pants avoid catching on tools and protect against splinters. Closed-toe shoes keep feet safe.
Work Environment
Proper Lighting
Adequate light, free from glare, allows you to clearly see cuts and grain. Consider task lighting.
Secure Workpiece
Clamp or vice your wood securely to avoid slippage under pressure from tools.
Clear Workspace
Keep floor clear of tripping hazards and work surfaces free of clutter.
Sharp Tools
Only use tools with sharp, undamaged blades. Dull or nicked blades require more pressure and can slip.
Safe Practices
Focus
Remain focused while carving without distractions. Take breaks if concentration lapses.
Grip
Hold your tools securely but not too tightly to avoid fatigue and hand discomfort.
Test Cuts
Make initial shallow cuts on less visible areas of the wood to check tool sharpness and grain direction.
Kid-Free Zone
Keep young children and pets away from the carving area for their safety.
With proper protective gear, a prepared workspace and safe habits, even beginners can minimize risks and carve wood comfortably for years to come.
Stay focused on the task at hand, respect the material you’re working with and accidents will be few and far between. Enjoy the journey – one conscious shaving at a time!
Easy Craft Project Ideas for Beginners
Build your skills and confidence with these 3 simple yet rewarding beginner projects:
Spoon Carving
- Uses whittling techniques and minimal tools
- Practice carving curved shapes that follow the wood grain
- Start with a single-spoon blank until comfortable, then move on to sets
Relief Carving Plaque
- Employs relief techniques on a flat surface
- Practice gradual wood removal in thin layers
- Carve simple patterns or an initial to build precision
- Great for gifts and wall decor
Festive Ornaments
- Applies round carving techniques to a small piece of wood
- Start with balls, teardrops and eggs that roll between your hands
- Add simple details like initials or textures
- Stain, paint and hang to showcase your improving skills
- Make multiples as gifts or seasonal decor
Tips for Any Project:
- Start Small – Choose an appropriately sized piece of wood to build up skills before tackling larger projects.
- Take Your Time – Resist the urge to rush. Slow, steady progress yields the best results.
- Focus on Technique – Let the final form emerge naturally rather than forcing a preconceived design.
- Check Often – Frequently inspect your progress to avoid removing too much wood at once.
- Practice Makes Perfect – Mistakes are learning opportunities. The more you carve, the better you’ll become.
With patience and repetition, even the most basic projects will push your skills forward in small but meaningful ways.
Let these first accomplishments fuel your motivation for more complex designs and techniques in the future. But for now, start simply and carve joyfully – one shaving at a time.
With these (or similar) beginner wood carving projects under your belt, you’ll gain confidence, build on techniques practiced and find motivation for tackling more advanced projects soon. The journey starts here, one conscious shaving at a time.
Interesting Woodcarving Styles around the world
Wood carving has evolved unique styles in cultures across the globe, each influenced by local traditions, materials and beliefs. As a beginner, explore these distinct carving traditions to gain inspiration:
African Mask Carving
- Common in West African cultures for rituals and ceremonies.
- Masks often represent mythological beings or ancestors.
- Features simple geometric shapes and patterns.
- Carvers use machetes, knives and adzes alongside fire and sanding.
Japanese Netsuke Carving
- Small sculptures that attach to kimono sashes as toggles.
- Typically feature animals, plants or mythical figures.
- Extremely detailed and complex thanks to minimal design.
- Carvers use tiny knives and chisels, plus patience and focus.
North American Totem Pole Carving
- Tall wood columns depicting mythological creatures and ancestors.
- Common among Pacific NW indigenous cultures like the Haida.
- Log poles carved almost entirely with adzes, creating flat surfaces.
- Carvings convey symbols important to the carver’s family or village.
As you develop your skills, explore other styles like:
- Scandinavian rosemåling
- Chinese scholar’s objects
- British Chip carving
- Indian temple carvings
Different styles offer new techniques, insights into material and symbolism, along with cultural inspiration for your own work.
As your skills and confidence grow, consider incorporating elements from these traditions into your carvings – blending the old and the new into something uniquely your own.
With patience and practice, you’ll find your personal style gradually emerging from the wood itself, one conscious shaving at a time.
Growing Your Skills – Learning More
Once you’ve gained confidence with basic projects and techniques, there are many ways to further develop your skills as a wood carver:
Join a Club or Workshop
- Meet other carvers for inspiration, feedback and new ideas.
- Learn techniques by observing experienced carvers in person.
- Gain access to specialized tools and materials.
- Exhibit and sell your carvings.
Online Courses and Videos
- Take structured courses taught by expert carvers to systematically improve techniques.
- Watch videos that demonstrate skills step-by-step and in slow motion for clarity.
- Practice at your own pace without time restrictions.
- Courses often provide project plans and material lists.
Reading Materials
- Books and magazines offer written instructions for techniques and projects.
- photos showcase details that are difficult to convey through video alone.
- Historical and cultural context helps inspire your own creative voice.
Online Forums and Blogs
- Connect with a global community of fellow carvers to share triumphs, frustrations and ask questions.
- Gain feedback and suggestions for improving your work.
- Hear about new tools, woods and techniques that keep your craft evolving.
As you progress, focus your learning on:
- Mastering AdditionalTechniques like ring carving, dimensional relief and pyrography.
- Experimenting with New Materials like stone, bones and antlers.
- Pushing Your Design Skills through complexity, abstraction and symbolism.
- Developing Your Own Personal Style that feels authentic and meaningful.
There will always be more to learn as a carver. But the joy comes from carving itself – from wielding your tools to uncover shapes, textures and details that resonate deep within the wood and within yourself.
Keep honing your skills through patience, repetition and feedback from others. Over time, your personal voice as a carver will emerge naturally from the material – one conscious shaving at a time.
Conclusion
With the right tools, techniques and safety precautions, even complete beginners can start their wood carving journey and achieve success through simple projects that build confidence and skill.
And with patience, practice and feedback over time, carvers refine their abilities to unlock the creative joy and meditative benefits this ancient art continues to provide.
We’ve covered the fundamentals to set you on the right path:
- Essential wood carving knives, gouges and mallets to get started.
- Fundamental relief, round and whittling techniques to build proficiency.
- Recommendations for choosing beginner-friendly wood based on grain, hardness and cost.
- Safety precautions for protecting yourself and ensuring a focused workspace.
- Easy spoon carving, plaque and ornament projects to develop precision and speed.
- Insights into world cultural carving styles for inspiration.
- Ways to further develop your skills and discover your personal voice as a carver.
As you begin this creative journey, remember to practice patience. Focus on technique over the final form. Let the wood guide your carving where it wants to go. And above all, carve mindfully and joyfully – one conscious shaving at a time.
Mistakes are learning opportunities, not failures. With dedication and repetition, even the simplest projects can push your skills and confidence forward in meaningful ways.
So grab your tools, select a suitable piece of wood and make that first cut. The rest you’ll figure out along the way.
The creative journey of wood carving awaits – and it starts with a single conscious shaving. I wish you the very best of luck on your new creative path!


