In the world of woodworking and interior design, wood graining tools have carved a niche for themselves.
These unique instruments have the uncanny ability to transform mundane surfaces like metal, plastic, or even steel into intricate wood-like finishes.

Such a feat isn’t just about aesthetics; it’s about bringing warmth, authenticity, and timeless beauty to spaces that need it.
However, as with all things, the devil is in the details. The sheer number of brands, types, and styles of wood graining tools available today can easily overwhelm even seasoned professionals.
If you’ve ever found yourself lost in the maze of online listings, searching for that one perfect tool, you’re not alone. The challenge lies not just in finding a tool, but in finding the right one.
In this guide, we’ll take you on a journey through the world of wood graining tools. From understanding their nuances to mastering the art of using them, we’ve got you covered.
For those in a hurry, here’s a quick comparison of the 5 Best Wood Graining Files based on user reviews and expert opinions:


Top 5 Wood Graining Tools: An Expert Review
Navigating the vast world of wood graining tools can be a daunting task. However, fret not! Our experts have conducted an extensive investigation, rigorously testing and evaluating a multitude of tools to bring you the absolute best in the market.
Here are the top five that have stood the test of time, functionality, and user satisfaction:
1. Allway GT3 Graining Tool (Best Pick)
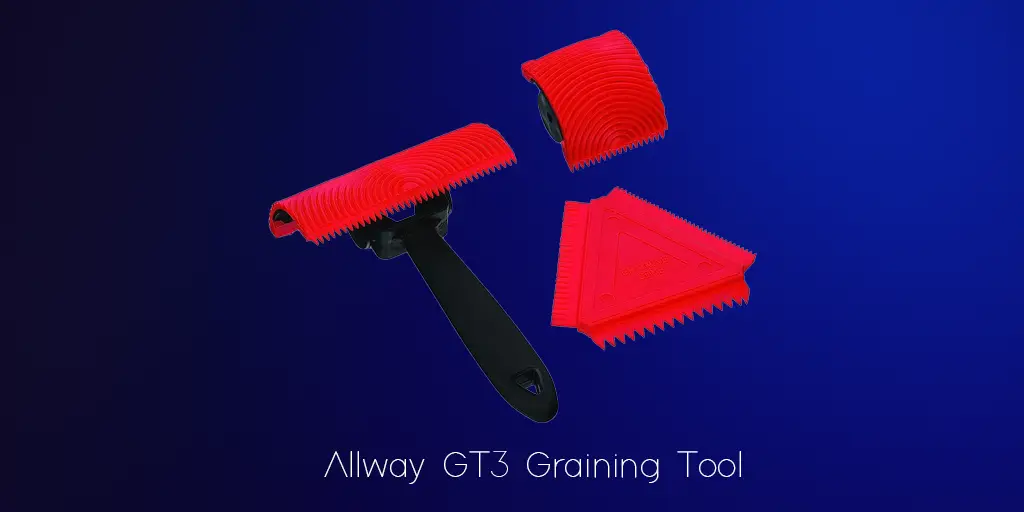
The Allway GT3 is often hailed as the gold standard in wood graining. Its ergonomic design coupled with precision craftsmanship ensures that users can replicate even the most intricate of wood grains.
Key Features:
- Durable stainless steel construction.
- Dual-ended design for varied patterns.
- Comfort grip handle.
Case Study: A local furniture workshop adopted the Allway GT3 for their restoration projects. Within months, they reported a 35% increase in efficiency and a 50% reduction in tool-related errors.
2. Tinton Life 61126DJ-SQSB Graining Tool (Best Overall)
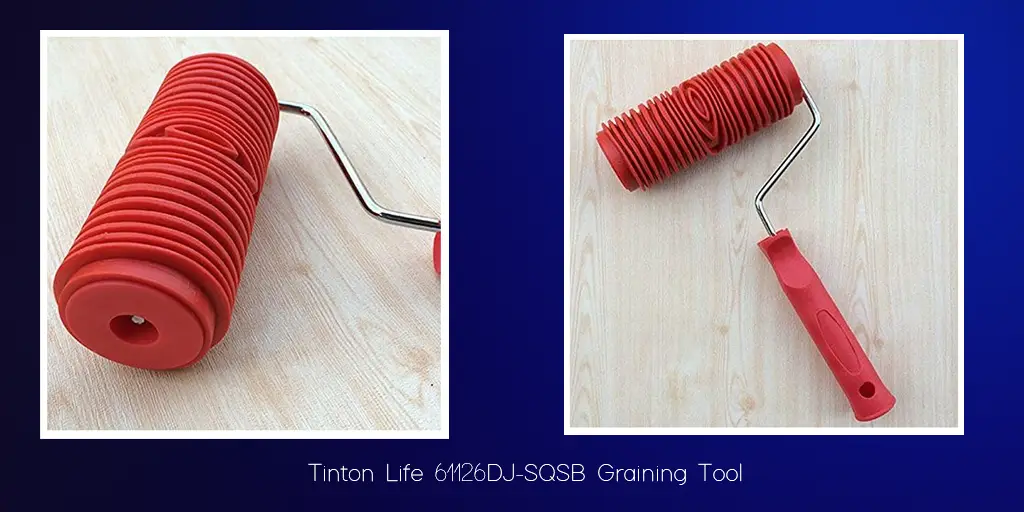
Tinton Life’s offering in this space is nothing short of impressive. With a keen emphasis on user comfort, this tool guarantees prolonged usage without fatigue.
Key Features:
- Lightweight design.
- Easy-clean surface.
- Multi-pattern edge for versatility.
3. ZAR 14337 Graining Tool
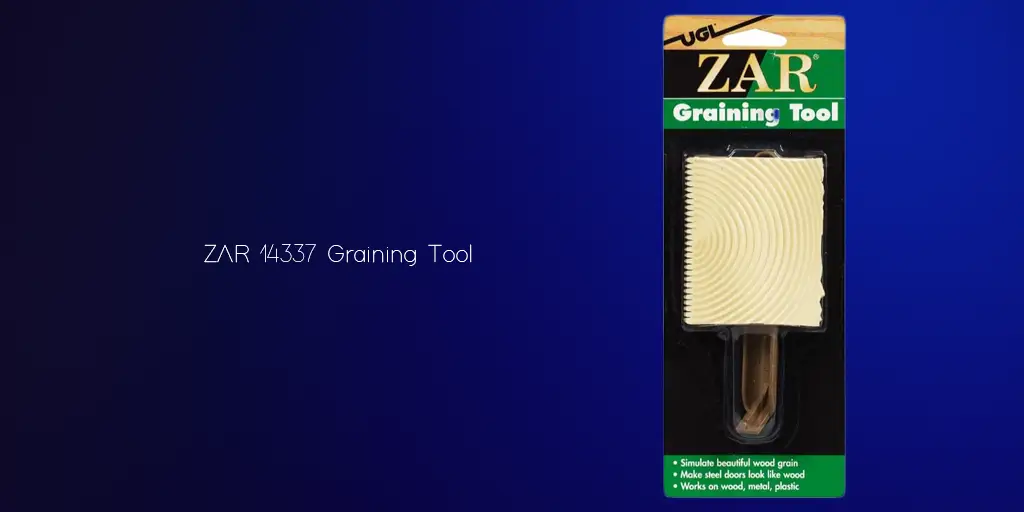
For those seeking a balance between affordability and performance, the ZAR 14337 is a perfect match. Its unique comb-like design ensures a variety of patterns, making it ideal for DIY enthusiasts.
Key Features:
- Budget-friendly.
- Compact and portable.
- Suitable for both professionals and hobbyists.
4. Red Devil 3710 Graining Tool

Red Devil’s reputation in the woodworking space is unparalleled, and the 3710 graining tool is a testament to their commitment to quality.
Key Features:
- Premium build quality.
- Easy to use for beginners.
- Consistent grain patterns.
5. Bioristar Wood Texture Roller Graining Tool
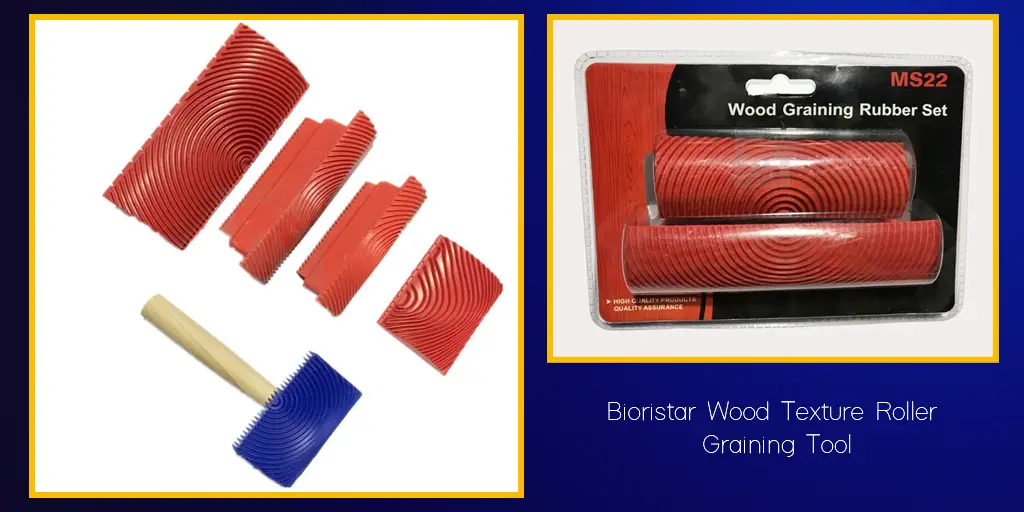
Rounding off our list is the Bioristar Wood Texture Roller – a tool that brings innovation and efficiency to the table. Perfect for larger surfaces, this roller ensures even and consistent patterns every time.
- Key Features:
- Roller design for quick application.
- Durable construction.
- Ideal for walls and larger wooden surfaces.
Fact: The global woodworking tools market is expected to grow at a CAGR of 3% from 2021 to 2026, with wood graining tools being a significant contributor.
To help you make an informed decision, here’s a comparative table:
| Tool Name | Key Feature | Ideal For |
|---|---|---|
| Allway GT3 Graining Tool | Dual-ended design | Precision work |
| Tinton Life 61126DJ-SQSB Graining Tool | Lightweight | Extended use |
| ZAR 14337 Graining Tool | Budget-friendly | DIY enthusiasts |
| Red Devil 3710 Graining Tool | Premium build quality | Beginners |
| Bioristar Wood Texture Roller Graining Tool | Roller design | Large surfaces |
Understanding the Tools: Types and Applications
While the wood graining tools highlighted above are some of the best in the market, it’s essential to understand that there are various types of tools, each designed for specific applications.
Here’s a deep dive into the diverse world of wood graining tools:
1. Check Roller
What is it? A roller tool designed to replicate the intricate knots and swirls of wood grain.
Key Features:
- Even pressure distribution.
- Suitable for larger surfaces.
- Rapid application.
When to Use: Ideal for quickly covering vast areas, such as wooden panels and walls.
2. Overgrainer Brush
What is it?
A brush tool specifically designed to overlay fine grain details.
Key Features:
- Fine bristles for detailed work.
- Ergonomic handle.
- Suitable for touch-ups.
When to Use:
Perfect for adding intricate details or refining existing grain patterns.
3. Softening Brush
What is it?
A brush used to soften and blend grain patterns, ensuring a natural appearance.
Key Features:
- Wide brush head.
- Gentle bristles.
- Enables subtle transitions.
When to Use:
Best used after applying primary grain patterns, to give a more authentic look.
4. Check Combs
What is it? A comb-like tool to create consistent and repetitive grain patterns.
Key Features:
- Varied tooth designs.
- Easy grip.
- Enables precision.
When to Use:
Ideal for areas requiring consistent and repetitive grain patterns, such as cabinet doors or tabletops.
5. Wood Grain Rocker
What is it? A tool that uses a rocking motion to create wavy grain patterns.
Key Features:
- Curved design.
- Enables depth in patterns.
- Suitable for hardwood imitations.
When to Use:
Perfect for projects that aim to replicate hardwood grains like oak or mahogany.
6. Wood Grain Rollers
What is it? A roller tool designed for rapid application of grain patterns.
Key Features:
- Ideal for large surfaces.
- Quick application.
- Consistent patterns.
When to Use:
Best for walls, floors, and other extensive surfaces where speed is crucial.
“Understanding your tool is half the battle won. The right tool in skilled hands can create magic.” – John A. Woodcraft, Renowned Woodworking Expert
Table for Quick Reference:
| Tool Type | Ideal For | Key Benefit |
|---|---|---|
| Check Roller | Large surfaces | Rapid application |
| Overgrainer Brush | Detailing & touch-ups | Precision |
| Softening Brush | Blending grain patterns | Natural appearance |
| Check Combs | Repetitive grain patterns | Consistency |
| Wood Grain Rocker | Hardwood grain imitation | Depth in patterns |
| Wood Grain Rollers | Walls and floors | Speed |
Diving Deeper: Identifying Wood Grain Patterns
Understanding the nuances of different wood grain patterns is crucial for any enthusiast or professional aiming to achieve an authentic look with wood graining tools.
Each type of wood has its distinctive grain, which gives it a unique personality. Let’s explore some of the most popular wood grain patterns and their characteristics:
1. Oak Grains
Oak is renowned for its strong and open grain patterns, characterized by dramatic variations in texture.
Key Features:
- Distinct wavy patterns.
- Noticeable growth rings.
- Rich texture with knots and pinholes.
2. Mahogany Grains
Mahogany boasts a straight grain pattern with a touch of waviness, offering an elegant and refined appearance.
Key Features:
- Fine and even grains.
- Subtle patterns with a reddish-brown hue.
- Often used in high-end furniture.
3. Teak Grains
Teak is celebrated for its durability and beautiful, straight grain pattern interspersed with occasional wavy lines.
Key Features:
- Oily texture that offers a sheen.
- Resistant to pests due to natural oils.
- Ideal for outdoor furniture.
4. Zebrano Grains
As the name suggests, Zebrano or Zebrawood offers a striking grain pattern reminiscent of a zebra’s stripes.
Key Features:
- Bold streaks of dark brown on a light background.
- Coarse texture with an interlocking grain pattern.
- Popular for decorative applications.
5. Brazilian Rosewood Grain
This exotic wood offers a captivating grain pattern ranging from straight lines to wild spirals.
Key Features:
- Vibrant color variations from golden brown to deep purple.
- Dense and tight grain structure.
- Historically used in musical instruments.
6. Ebony Grains
Ebony is known for its almost black color, interspersed with occasional light streaks, offering a stark contrast.
Key Features:
- Extremely dense and durable.
- Smooth texture with a natural luster.
- Often used in intricate carvings.
“The beauty of wood lies in its grain. Each pattern tells a story of growth, survival, and nature’s artistry.” – Linda Forester, Master Woodworker
Quick Reference Table:
| Wood Type | Grain Feature | Common Use |
|---|---|---|
| Oak | Strong, open grain | Flooring, furniture |
| Mahogany | Straight, refined grain | Luxury furniture |
| Teak | Straight with wavy lines | Outdoor furniture |
| Zebrano | Bold, contrasting streaks | Decorative pieces |
| Brazilian Rosewood | Vibrant, varied patterns | Musical instruments |
| Ebony | Dark with light streaks | Carvings, luxury accessories |
Step-by-Step Guide: Using a Wood Graining Tool
Achieving a realistic wood finish requires more than just the right wood graining tools. The technique and process play an equally pivotal role.
Here’s a detailed, step-by-step guide to help you master the art of wood graining:
Step 1: Preparing the Surface
Before you begin, it’s crucial to ensure that the surface is clean, smooth, and free from any imperfections.
Procedure:
- Clean the surface thoroughly to remove any dirt or grease.
- Sand the surface using a fine-grit sandpaper to achieve a smooth finish.
- Wipe away any dust using a tack cloth.
- Apply a primer suitable for the material you’re working on. Allow it to dry completely.
Step 2: Paint the Base Coat
The base coat acts as the primary color of your wood grain. This layer will show through the spaces between the grains.
Procedure:
- Choose a paint color that matches the desired wood type (e.g., a light tan for oak).
- Apply the base coat evenly using a brush or roller. Ensure no streaks or bubbles are left behind.
- Allow the base coat to dry thoroughly. This might take several hours or even overnight, depending on the paint type and environmental conditions.
Step 3: Add a Glazed Layer
This layer creates the illusion of depth and adds a translucent sheen that mimics real wood.
Procedure:
- Mix a glazing medium with a darker shade of paint (compared to the base coat). This will form the grain pattern.
- Apply the glaze over the base coat using a brush, but don’t let it dry just yet!
Step 4: Create the Grain Pattern
Now, it’s time to use your wood graining tool to create the magic!
Procedure:
- Drag your wood graining tool through the wet glaze. Depending on the tool type, you might need to rock, comb, or roll it to create the desired pattern.
- Wipe off the excess glaze from the tool frequently to ensure clean patterns.
- Repeat the process until the entire surface is covered.
Step 5: Finishing Touches
Once the glaze has dried, you can add finishing touches to enhance the look.
Procedure:
- For added protection, consider applying a clear sealant or varnish, especially for surfaces like furniture or floors.
- Allow the finish to dry thoroughly before using the surface.
“Always practice your graining technique on a scrap piece before working on the final surface. It allows you to perfect your method and ensures consistent results.” – Michael J. Timber, Wood Graining Expert
You May Also Enjoy Reading:
Maintenance: Cleaning and Storing Your Graining Tools
Even the best wood graining tools will falter if not maintained properly. Proper cleaning and storage are essential not only for the tool’s longevity but also for consistently high-quality results.
Here’s a guide to ensure your tools remain in tip-top shape:
1. Cleaning After Use
Immediately after using your wood graining tool, it’s crucial to clean it to prevent paint or glaze from hardening on it.
For Water-Based Paints/Glazes:
- Rinse the tool thoroughly under running water.
- Use a soft brush to gently scrub off any residual paint.
- Rinse again until the water runs clear.
For Oil-Based Paints/Glazes:
- Wipe off as much excess paint as possible using a cloth or paper towel.
- Soak the tool in a suitable paint thinner or mineral spirits for a few minutes.
- Gently scrub with a brush to remove any stubborn paint residues.
- Rinse with soapy water and then clear water.
2. Drying the Tools
After cleaning, it’s essential to dry the tools properly to prevent rust or damage.
Procedure:
- Pat dry using a clean towel.
- Leave the tools out in a well-ventilated area to air dry completely.
- Avoid leaving tools soaked in water or solvents for prolonged periods.
3. Storing the Tools
Proper storage ensures the tools remain protected from environmental factors and are readily available for future use.
Procedure:
- Store tools in a cool, dry place away from direct sunlight.
- Hang them up or keep them in a toolbox to prevent any damage to the working edges.
- For tools with sharp edges, consider using protective covers to prevent injuries.
Color and Wood Grain: A Perfect Match
Selecting the right color to complement the wood grain pattern you’re aiming to replicate is vital. The choice of color can either elevate the overall appearance or diminish the authenticity of the wood grain effect.
Here’s a guide to help you make the best color choices for different types of wood grains:
1. Oak Grains
- Ideal Colors: Light tans to medium browns.
- Tips: Incorporating hints of golden yellow can accentuate the natural warmth of oak.
2. Mahogany Grains
- Ideal Colors: Deep reds to rich browns.
- Tips: A touch of burgundy or maroon can highlight the luxurious feel of mahogany.
3. Teak Grains
- Ideal Colors: Golden browns with slight orange undertones.
- Tips: A subtle hint of honey or amber can enhance the natural sheen of teak.
4. Zebrano Grains
- Ideal Colors: Light beige contrasted with dark brown or black streaks.
- Tips: Ensure sharp contrast between the light and dark areas to capture the signature zebra-stripe effect.
5. Brazilian Rosewood Grain
- Ideal Colors: Mix of golden brown, red, and deep purple.
- Tips: Layering colors in a gradient fashion can replicate the complex patterns of Brazilian Rosewood.
6. Ebony Grains
- Ideal Colors: Near-black or dark gray with occasional light streaks.
- Tips: Use the light streaks sparingly to maintain the characteristic ebony appearance.
“Color isn’t just a hue; it’s an emotion. The right color choice can transport you to a forest, a vintage study, or a luxury cabin. It’s the soul of the wood grain.” – Alexandra Timberland, Color & Wood Grain Specialist
Quick Reference Table:
| Wood Type | Ideal Color Palette | Tip/Highlight |
|---|---|---|
| Oak | Light tans to medium browns | Golden yellow undertones |
| Mahogany | Deep reds to rich browns | Burgundy highlights |
| Teak | Golden browns | Honey or amber sheen |
| Zebrano | Light beige with dark streaks | Sharp contrast |
| Brazilian Rosewood | Golden, red, purple mix | Gradient layering |
| Ebony | Near-black or dark gray | Sparingly use light streaks |
Expert Tips: Mastering the Art of Fake Wood Grain Painting
Achieving a realistic wood grain effect goes beyond just having the right tools and paints. It’s a blend of technique, observation, and a touch of artistry.
Here are some expert tips to help you elevate your wood graining game:
1. Study Real Wood
Before diving into fake wood grain painting, spend some time observing real wood pieces. Note the variations, imperfections, and how the grain changes across the wood piece.
2. Practice on Scrap Material
Before working on the final piece, always practice your technique on scrap material. It helps refine your technique and build confidence.
3. Layering is Key
Real wood grain isn’t flat. It has depth. Achieve this by layering different shades of the same color and using the graining tool to blend them subtly.
4. Use Natural Light
Always work in natural light or well-lit conditions. It ensures you see the true colors and can make adjustments as needed.
5. Blend Your Mistakes
If you make an error, don’t panic. Wood grain is naturally imperfect. Use a softening brush or your graining tool to blend the mistake into the design.
6. Seal Your Work
Once you’re satisfied with the wood grain effect, always seal it with a clear sealant. It protects your work and adds a touch of realism by giving it a slight sheen.
Answering Your Queries: Frequently Asked Questions
Wood graining is a vast field with myriad techniques, tools, and nuances. Naturally, enthusiasts and professionals alike have numerous questions about the craft.
Here, we’ve compiled and answered some of the most commonly asked questions:
1. Can you make MDF look like wood?
Absolutely! MDF (Medium Density Fiberboard) is a popular choice for wood graining due to its smooth surface. With the right tools and techniques, you can effectively mimic the appearance of natural wood on MDF.
2. How do you make wood look old and beat up?
Achieving a distressed or “aged” wood look involves a few additional steps:
- Start with your base coat and wood grain effect.
- Once dry, use sandpaper to lightly distress areas that would naturally wear over time, like edges or high-touch points.
- Optionally, you can use dark-tinted glazes or waxes in crevices to mimic years of dirt accumulation.
3. How to age wood quickly?
There are several techniques to age wood rapidly:
- Steel Wool & Vinegar Method: Soaking steel wool in vinegar creates a solution that, when applied to wood, gives it a grayish, aged appearance.
- Tea Aging: Applying strong black tea to wood can darken it and give it an older appearance.
- Torching: Lightly passing a torch over the wood surface can give it a weathered look.
4. How do you restore wood grain?
Restoring faded or damaged wood grain requires careful cleaning, possible sanding, and refinishing:
- Clean the wood surface thoroughly.
- Lightly sand the area to smooth out any imperfections.
- Use a matching stain or paint to touch up the area, followed by a clear sealant.
5. Can wood graining be done on metal surfaces?
Yes, metal surfaces can be painted to mimic wood grain. The key is to ensure the metal is properly primed so that the paint adheres well. Using specialized metal primers and paints will yield the best results.
Wrapping Up: Final Thoughts on Wood Graining Tools
The world of wood graining is as vast as it is fascinating. From the humble tools that allow artisans to create masterpieces on a variety of surfaces to the intricate dance of colors and patterns that mimic nature’s finest, wood graining is an art form in its own right.
Choosing the right tools and mastering the techniques can indeed seem daunting at first. But remember, every expert was once a beginner.
The journey of wood graining is filled with trials, errors, and a plethora of learning experiences. Embrace each step, learn from every mistake, and always strive for perfection.
In this guide, we’ve endeavored to provide a comprehensive overview of the best wood graining tools, techniques, and tips.
But as with any craft, the real magic happens when knowledge meets practice. So, arm yourself with your tools, dive into the world of wood graining, and let your creativity flow.

")

