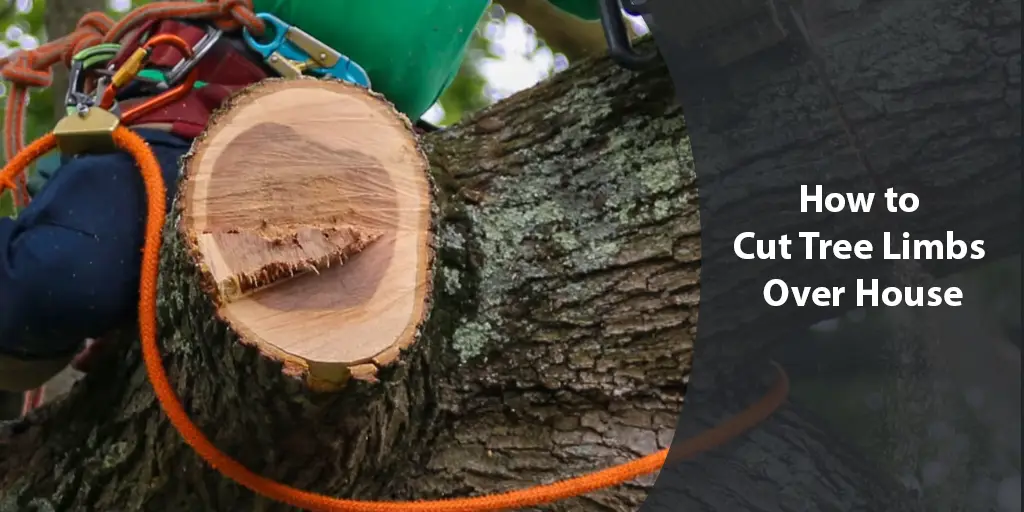
Have you been putting off dealing with those overgrown tree limbs that hang over your house? Managing tree limbs is important for safety and to prevent damage, but it can seem like an intimidating task.
In this guide, we’ll break down everything you need to know in a clear, step-by-step manner so you can feel confident tackling this project.

Overhanging tree limbs pose risks like blocked views, falling debris during storms, and even potential injury or property damage if limbs contact structures or power lines.
However, with the right information and safety practices, you can effectively prune tree limbs and keep your trees healthy and your property protected.
Whether you decide to do the work yourself or hire an arborist, understanding proper techniques and maintenance is essential.
We’ll start by reviewing the indicators that tell you when tree limbs need attention. Then, we’ll provide an overview of the different methods to trim limbs safely depending on their location and size.
You’ll also learn about any local regulations to follow and how to select the proper tools and protective equipment for the job.
Detailed guidance on tree limb removal techniques, cleanup, and when an arborist may be preferable will give you the knowledge to approach this project with confidence.
By the end, you’ll have a solid plan to evaluate and care for the trees around your home on an ongoing basis.
Armed with the best practices covered here, you can tackle overhanging tree limbs safely and prevent future issues from developing.
Recognising When Tree Limbs Need Attention
Being able to identify when tree limbs need pruning or removal is essential for proper maintenance. With some knowledge of the signs to look for, you can confidently determine if action is warranted. Let’s break down the key indicators that tree limbs require attention.
One telltale sign is visible damage or decay. Look for cracked, splitting or severely leaning limbs which pose a falling risk.
Peeling bark and hollowed-out areas indicate decay below the surface as well. Additionally, deadwood with no leaves or signs of life should be removed. These damaged limbs could drop unexpectedly during storms.
Examine growth patterns as well. Crossing, rubbing or narrowly attached branches have weakness points that make them prone to breaking off in high winds or from accumulated snow/ice.
Overgrown limbs may be stressed from their own weight too. Keep an eye on any irregularly shaped branches with included bark (bark trapped between branches).
Check for potential interference or hazards as well. Limbs growing into utility lines, touching the roof or blocking your sightlines are potential problems. Overcrowding inhibits full leaf growth too.
It’s also important to be aware of your trees’ natural growth cycles. Many species will shed lower branches over time as the canopy grows taller. Know what’s normal seasonal dieback versus cause for concern.
With a grasp of these indicators, you’ll be able to confidently determine when your trees would benefit from maintenance pruning to remove potential risks and keep them healthy for years to come. Be sure to re-evaluate your trees periodically for any changes.
Planning and Preparation
Before starting any tree work, taking some time to plan and prepare is crucial. Doing so ensures the job goes smoothly and safely.
Research your local regulations regarding tree pruning or removal. Confirm any needed permits as requirements can vary by municipality. Abiding by regulations prevents legal issues down the line.
Closely examine the tree and job scope. Evaluate the overall health of the tree as well as the size and position of the targeted limbs.
Determine if you have the right tools, skill level and access needed, such as a bucket truck for high branches. Do not hesitate to hire an arborist if you lack experience or ability.
Confirm your equipment is up to code and in good operational condition. Inspect protective gear like chainsaw chaps for damage. Fallen branches are unpredictable, so plan work areas, buffers and emergency response accordingly.
For large removals, contact your utility company in advance to request temporary power shut-offs as needed. Clear the work zone beneath the tree of anything that could become debris.
Safety should drive every decision. With careful planning factored in, you can craft a smart, low-risk strategy customized to your tree’s needs.
Don’t get in over your head – starting a job you’re not properly set up for can lead to accidents. Taking time for this preparation stage ensures your tree work goes as smoothly and safely as possible from start to finish.
Safety First
When working with tall trees and power equipment, safety should be the top priority. Taking the proper precautions goes a long way in preventing accidents.
Quality personal protective equipment is a must-have. For potentially dangerous tasks like powered saw operation, wear a certified chainsaw safety helmet, snug-fitting gloves made for chain braking, and protective chaps.
Eye and ear protection are equally important due to flying debris. Dress appropriately as well – avoid loose clothes that could catch.
Set up exclusion zones by barricading off the area directly beneath branches being cut. Prevent unauthorized people and pets from entering the work area. Focus fully on the task at hand without distractions.
Use the right tool for each job and operate it safely per the owner’s manual. Ensure saws are properly maintained with sharp, tensioned chains. Carry a well-stocked first aid kit on site.
For very large branches or those high off the ground, it may be best to hire an experienced arborist with professional lift equipment and certified climbing skills.
Their specialized safety training and high-reach vehicles minimize risks compared to using makeshift solutions at height.
Maintaining awareness of overhead hazards, using protective gear properly, focusing fully on the work, and knowing your limitations will keep you safe through the entire project.
Remember – safety should always come before speed or deadlines when dealing with potentially dangerous tree work.
Tools and Equipment
Having the right tools for the job is key to performing tree work efficiently and safely. Let’s review the essential gear and how to use it properly.
Pruning shears are best for branches under 1-2 inches thick. Purchase top-handle or bypass models for control. Keep blades sharp.
Pruning saws feature razor-sharp blades suited for limbs up to 6 inches thick. Look for models with curved, reinforced backs and soft grips.
Powered chainsaws should only be used by trained individuals, as they require safety certification. Buy saws from reputable brands matched to your needs. Keep chains sharp and properly tensioned.
Rope, tie-offs and harnesses allow ascending trees safely. Inspect gear for wear before each use. Only tie-in points rated for your weight class.
Extension pruners greatly reduce climbing and reach branches up to 25 feet high from the ground. Expandable or telescoping models offer adjustability.
Loppers are long-handled, anvil-style shears that cut branches up to 1 inch thick out to your arm’s length. Comfortable grips are important.
Buckets, lifts and tracked lifts provide elevated work platforms with built-in safety rails. Rent heavy equipment only from licensed operators with certified operators.
Properly store and maintain all tools to prevent damage. Before each use, inspect for cracks, loose parts or other defects.
Replacing dull, worn or outdated gear prevents unnecessary risk. Well-cared for equipment performs best for years to come.
Tree Limb Removal Techniques
Mastering safe removal methods is essential to completing tree work efficiently and deliberately. Let’s review the principals of proper pruning technique.
Always make three cuts when removing a branch – the first cut undercuts the branch 1-2 inches further out, the second top cut removes the bulk of the limb, and the third finishing cut cleans away the remaining stub.
For branches up to 2 inches thick, make cuts just outside the branch collar – the swollen area where it joins the parent branch or trunk. This encourages sealing over.
On thicker limbs, angle cuts just outside the branch collar about 1/3 of the way through from the bottom. Then cut from the top 1-2 inches further out to remove the bulk. Finish by cutting the stub flush.
Use removal cuts rather than breaking when possible to prevent tearing bark. Keep hands/body out of cut zones by bracing limbs or using ropes for control.
Mark branches before cutting to ensure proper sequence and falling direction away from buildings, utility lines.
For overhead removal, stand at a 45 degree angle and thrust-cut downwards using your bodyweight for control. Concentrate fully without rushes or distractions.
Always seemly progress smaller branches while working up to larger cuts. Use the appropriate removal technique matched to each branch’s location and angle for safety and control. Proper removal methods like these get the job done right.
Cleanup and Disposal
After completing tree work, taking time for thorough cleanup is important from both safety and environmental standpoints. Follow these best practices:
Inspect the full work area, including overhead, and remove any remaining debris. Even small branches left behind could re-enter the tree later or become projectiles in storms.
Stack cut branches neatly at the curbside if your municipality chips them. Contact your service in advance of large pickups.
For disposal yourself, cut branches into 4-foot lengths and bundled less than 50 pounds for trash collection.
Chop or saw larger pieces too large for the bin. Consider renting a wood chipper or finding local sites accepting landscape waste.
Never burn cut tree parts unless your area permits open burning. Smoke and flying embers pose a fire risk otherwise.
Sweep or blow saw dust and debris from surfaces like the roof, driveway or lawn afterwards. Vacuum interior areas as needed.
Inspect all equipment for embedded debris or residue and clean thoroughly before storing away.
Proper cleanup leaves your trees, property and tools in like-new condition, reduces future hazards, and keeps your community clean and green.
Taking the time for careful disposal completes the maintenance process safely and responsibly.
When to Hire an Arborist
While many tree maintenance tasks can be handled by a homeowner, some jobs do call for professional assistance. Let’s review the signs it’s better to hire an arborist.
Very large trees, heavy lifting or tall branches require specialized gear like chippers, lifts, and ropes. Homeowner ladders and DIY rigging often can’t reach high enough safely.
If a tree shows extensive decay, structural weakness, or is heavily weighted, an evaluation by a certified arborist is prudent before attempting removal yourself. They have tools to inspect inner trunk conditions.
Major trimming of multiple large limbs simultaneously is best left to professionals with experience managing branch load distribution and handling falling debris safely.
Working near overhead power lines, buildings, or other infrastructure introduces risks that require a highly trained arborist with insurance. They also obtain permits for this type of work.
Rather than renting large equipment or learning access techniques on the job, certified arborists own and maintain industry-rated gear daily. Their training provides critical safety certifications as well.
An arborist consultation ensures trees receive targeted solutions tailored to their health. They can advise ongoing maintenance plans to keep trees healthy and reduce long-term costs compared to DIY efforts.
Knowing when the scope or hazards exceed your capabilities can prevent accidents. For complicated or high-risk situations, an arborist delivers projects swiftly and safely per industry standards.
Conclusion
Through this comprehensive guide, you should now feel confident in your ability to properly care for the trees around your home through regular maintenance and professionally when necessary. Remember to:
- Continually inspect tree limbs seasonally for any changes requiring action to catch potential issues early.
- Select the right tools for each pruning job and inspect/replace gear as needed to maximize safety and efficiency.
- Apply the correct three-cut removal technique for each branch based on its attributes to minimize tearing and guide fall direction.
- Thoroughly clean up debris to avoid future hazards and keep your community and environment clean.
- Determine the timing for hiring an arborist based on scope, access needs, and your skill level compared to the task. Certified professionals are worth employing for high-risk scenarios.
- Always prioritize safety by using PPE, barricades, ropes/harnesses as needed, focused attention, and calling in help for beyond-your-ability jobs. Taking precautions prevents accidents.
By upholding these best practices, you can proactively maintain healthy, beautiful trees that enhance your landscape for years to come while avoiding potential property damage or injury risks.
Consider this knowledge a starting point for ongoing education to refine your tree care abilities over time.


