In the realm of woodworking, the process of sanding of wood stands as a pivotal step towards achieving a perfect finish.
This comprehensive guide delves into the intricacies of using various sanding tools, from belt sanders to a simple sanding block, to prepare wood surfaces for subsequent coats of paint or stain.
We’ll explore techniques for sanding by hand, employing finer grit sandpaper for delicate finishes, and utilizing medium to fine grit sandpaper for general wood finishing.
Whether working with raw wood or aiming to smooth out scratches left by the coarse grit on flat surfaces, this guide, possibly containing affiliate links for your convenience, will provide in-depth knowledge on achieving a smooth finish.
We’ll also discuss the use of a tack cloth for cleaning, and the importance of a sanding pad in your toolkit.
By the end of this guide, whether you choose to sand wood by hand or with power tools, you’ll be equipped with the knowledge to achieve that flawless look on your woodworking projects.
Knowing Your Grits and Sandpaper
The Basics of Sandpaper
Sandpaper is an essential tool in the sanding of wood, and understanding its types and grits is crucial for a successful finish.
Essentially, sandpaper consists of abrasive particles bonded to a backing material, and it’s the grit size of these particles that defines the coarseness or fineness of the sandpaper.
Grit Numbers Explained
- Coarse Grit (40-60 Grit): Ideal for removing large scratches and evening out rough surfaces.
- Medium Grit (80-120 Grit): Used for smoothing out the roughness left by coarse sandpaper. Perfect for preparing wood for finer finishes.
- Fine Grit (150-180 Grit): Suitable for the final sanding before applying paint or stain. It smooths out the scratches left by the medium grit.
- Very Fine Grit (220-240 Grit): Often used for final touches or between coats of paint or varnish.
Choosing the Right Sandpaper
- For Raw Wood: Start with a medium grit to smooth out the surface, then progress to a finer grit for a smooth finish.
- For Painted Surfaces: If you’re dealing with multiple coats of paint, starting with a coarse grit might be necessary, followed by a medium and then fine grit for a smooth base.
Tools to Assist Sanding
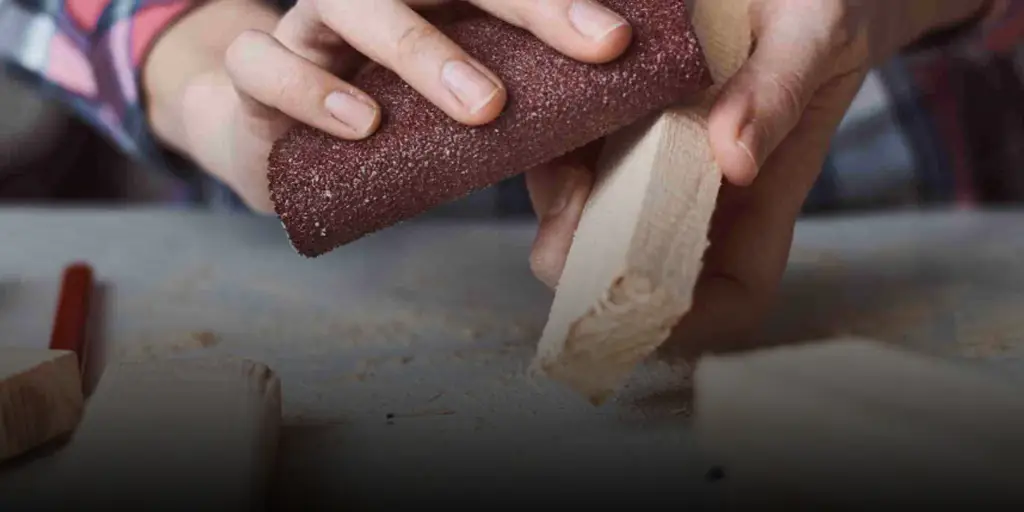
- Sanding Block: Handy for manual sanding, providing even pressure and making it easier to sand flat surfaces.
- Belt Sanders: Ideal for large surfaces or heavy-duty sanding tasks. They save time and effort, especially on rougher woods.
- Sanding Pad: Useful for both hand sanding and as an attachment for power sanders, helping to evenly distribute pressure and reduce the chance of creating grooves in the wood.
By understanding the different types of sandpaper and their specific uses, you can better prepare wood surfaces for any finishing process, ensuring a smooth and professional result.
Preparing for Sanding
Safety First
Before diving into the sanding of wood, it’s crucial to prioritize safety. Always wear protective gear, including safety goggles to shield your eyes from dust, and a dust mask or respirator to prevent inhalation of fine particulates.
Additionally, ensure your workspace is well-ventilated, especially when sanding treated or painted wood.
Setting Up Your Workspace
- Dust Management: Utilize a dust collection system if available, especially when using power sanders like belt sanders. Alternatively, a simple shop vacuum can help keep your area clean.
- Stable Work Surface: Secure the wood piece to a stable surface. Clamps or vices are excellent for keeping the wood in place, preventing it from moving while sanding.
- Lighting: Good lighting is essential. It helps in identifying any imperfections on the wood surfaces that need attention during sanding.
Pre-Sanding Checks
- Inspect the Wood: Look for any nails, screws, or splinters that might damage your sandpaper or tools. Remove any metal fasteners before proceeding.
- Surface Cleaning: Wipe down the wood with a tack cloth or a damp rag to remove dirt and debris. This ensures a clean surface for sanding and better results.
Choosing Your Sanding Tools
- For Large, Flat Surfaces: Power sanders like belt sanders or orbital sanders are effective and time-efficient.
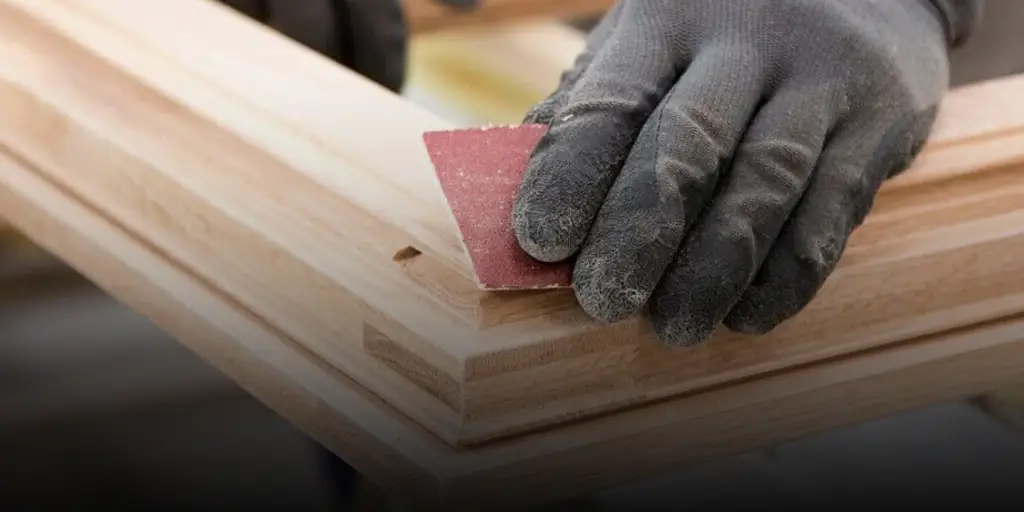
- For Detailed Work: A sanding block or sanding pad is ideal for precision work, especially on intricate designs or hard-to-reach areas.
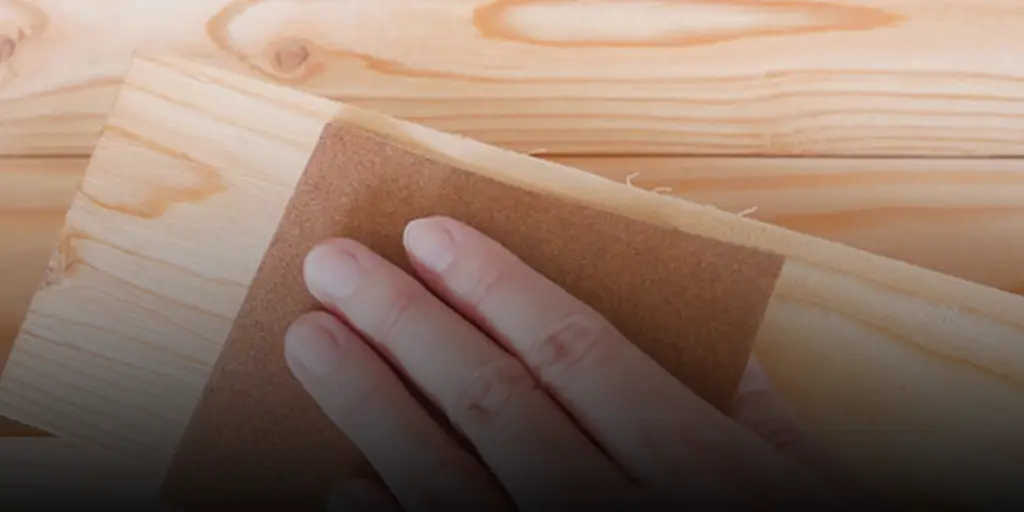
- For Sanding by Hand: When precision and care are required, or when working on delicate surfaces, sanding by hand with a sanding block can provide the best control.
By adequately preparing for the sanding process and choosing the right tools for your project, you can ensure a more efficient and safer sanding experience.
Step-by-Step Guide to Sanding Wood

Initial Assessment of the Wood
- Examine the Grain: Identify the direction of the wood grain, as this will dictate your sanding direction. Sanding parallel to the grain reduces the risk of scratches and improves the final appearance.
- Check for Flaws: Look for any imperfections, such as dents, scratches, or rough patches, that need to be addressed during the sanding process.
Starting with Coarse Grits
- Begin with a Coarse Grit (60-80): Start with a coarser grit to remove the major imperfections and level the surface. This is particularly important for raw wood or surfaces with existing coats of paint or varnish.
- Sanding Technique: Use steady, even strokes, applying uniform pressure. For power tools like belt sanders, let the tool do the work without applying excessive pressure.
Progressing to Finer Grits
- Move to Medium Grit (100-150): After the surface is even, switch to a medium grit sandpaper. This step removes the scratches left by the coarse grit and prepares the wood for finer sanding.
- Finish with Fine Grit (180-220): The final sanding with fine grit sandpaper ensures a smooth finish, essential for wood finishing, whether you plan to apply paint or stain.
Final Touches and Cleaning Up
- Wipe Down with Tack Cloth: After completing the sanding, it’s important to remove all the sawdust from the wood surfaces. A tack cloth works well for picking up fine dust particles.
- Vacuuming: For larger projects, using a shop vacuum can efficiently remove sawdust from the wood and the surrounding area.
- Final Inspection: Conduct a final check for any missed spots or uneven areas. A well-lit workspace is crucial for this final inspection.
By following these steps, you can ensure a thorough and effective sanding process, setting the stage for a beautiful and durable finish on your woodworking project.
Special Techniques and Tips
Sanding With the Grain
- Importance of Grain Direction: Always sand in the direction of the grain to minimize visible scratches. Sanding against the grain can leave noticeable marks that are difficult to remove and can mar the final appearance of your woodwork.
- Technique: Use long, smooth strokes that follow the grain pattern. This technique is crucial for achieving a professional, smooth finish.
Sanding Curved and Intricate Areas
- Hand Sanding: For intricate designs or curved areas, hand sanding with a flexible sanding pad or a piece of sandpaper wrapped around a suitable shape (like a dowel) is effective.
- Detail Sanders: For more complex shapes, detail sanders can reach tight spots and maintain the integrity of the design.
Avoiding Common Sanding Pitfalls
- Even Pressure: Apply consistent pressure while sanding to avoid creating dips or uneven surfaces.
- Changing Sandpaper Regularly: Replace sandpaper once it becomes clogged or dull. Fresh sandpaper is more efficient and delivers better results.
- Avoid Over-Sanding: Over-sanding can lead to thinning of the wood, especially on veneers, and can also close the pores of the wood, affecting the absorption of stains or finishes.
Tips for a Perfect Finish
- Start with Coarser Grits: Begin with lower grits and progress to finer grits. This stepwise approach ensures that each grit removes the scratches left by the previous one.
- Check Progress Regularly: Frequently check your progress by feeling the wood with your hand for any rough spots or by examining the surface in good light.
- Final Touch with Fine Grit: Finish with a fine grit sandpaper (like 220 grit) for a perfectly smooth surface that’s ready for wood finishing, whether it’s paint or stain.
By employing these special techniques and being mindful of common pitfalls, you can master the art of sanding of wood, paving the way for a flawless finish in all your woodworking projects.
Sanding Different Types of Wood
Understanding Wood Varieties
- Hardwoods vs. Softwoods: Hardwoods, like oak and maple, require more effort to sand due to their density. Softwoods, such as pine, are easier to sand but more prone to over-sanding.
- Veneers: These thin wood layers demand gentle sanding with fine grit sandpaper to avoid wearing through the veneer.
Customizing Sanding Techniques
- For Hardwoods: Start with a medium grit sandpaper and progress to finer grits. The durable nature of hardwood allows for more aggressive sanding at the start.
- For Softwoods: Use finer grit sandpaper and sand gently. Softwoods can easily get dented, so a lighter touch is necessary.
- For Veneers: Since veneers are thin, avoid coarse grits. Start with a fine grit and be gentle to prevent sanding through the veneer.
Addressing Different Surface Types
- Flat Surfaces: Use an orbital sander or a sanding block for even pressure distribution. It’s crucial for maintaining the flatness of the surface.
- Contoured Surfaces: Hand sanding with a flexible sanding pad or sandpaper wrapped around a custom-shaped block is effective for maintaining the integrity of the shape.
Tips for Specific Wood Types
- Oily Woods: Some exotic woods are oily and may clog sandpaper quickly. Wipe the surface with a solvent before sanding to reduce clogging.
- Painted Wood: If sanding wood with existing coats of paint, start with a coarser grit to remove the paint layers and then progress to finer grits for a smooth base.
By tailoring your sanding approach to the type of wood you are working with, you can achieve optimal results while preserving the integrity and beauty of the wood.
Sanding Before Staining vs. Painting
Preparing Wood for Staining
- Importance of a Smooth Base: When staining, any imperfections on the wood surface will be highlighted. Therefore, achieving a smooth base is crucial.
- Progressive Sanding: Start with a medium grit and gradually move to a finer grit. This ensures that the deeper scratches are effectively removed before applying the stain.
- Final Sanding: Finish with a fine grit sandpaper, like 220 grit, to create a smooth surface that will absorb the stain evenly.
Preparing Wood for Painting
- Objective of Sanding: Unlike staining, sanding for painting doesn’t need to be as thorough. The primary goal is to create a surface that the paint can adhere to.
- Sanding Technique: A light sanding with a medium to fine grit sandpaper is often sufficient. It’s more about scuffing the surface than achieving a smooth finish.
- Cleaning the Surface: After sanding, remove all dust with a tack cloth or a damp rag to ensure a clean surface for painting.
Key Differences
- Depth of Sanding: Staining requires more meticulous sanding to achieve a flawless finish, while painting requires only enough sanding to ensure good adhesion.
- Grit Selection: For staining, finer grit sandpapers are crucial, whereas, for painting, medium grits are often adequate.
By understanding these differences and adjusting your sanding technique accordingly, you can prepare your wood surfaces effectively for either staining or painting, ensuring a high-quality finish in your woodworking projects.
Advanced Sanding Techniques
Using Power Sanders
- Belt Sanders: Ideal for quickly removing material from large, flat surfaces. They are best for initial stages of sanding, especially for leveling rough surfaces.
- Orbital Sanders: These are versatile and less aggressive than belt sanders, suitable for intermediate to fine sanding. They provide a smoother finish and are easier to control.
- Detail Sanders: Perfect for getting into tight corners and intricate areas where larger sanders can’t reach.
Wet Sanding
- Application: Wet sanding is used for extremely fine finishes, typically in the final stages of wood finishing. It involves using water or a lubricant with waterproof sandpaper.
- Benefits: It reduces dust, helps in achieving an ultra-smooth finish, and prevents the sandpaper from clogging.
- Process: Soak the sandpaper in water for a few minutes, then sand with light pressure. Wipe the surface regularly to remove the slurry formed during wet sanding.
Sanding at a 45-Degree Angle
- Technique: For efficient material removal, sanding at a 45-degree angle to the grain can be effective. This technique is a balance between aggressive material removal and maintaining surface integrity.
- Application: Useful when needing to remove more material than straight grain sanding allows but wanting to avoid the harsh impact of cross-grain sanding.
Good Lighting and Inspection
- Importance of Lighting: Adequate lighting is essential to spot any remaining scratches or imperfections. It’s particularly crucial when performing final sanding before applying finishes.
- Inspection: Regularly inspect the surface from different angles under good light to ensure a uniform and smooth finish.
By mastering these advanced sanding techniques and understanding when to apply them, you can enhance the quality of your sanding process, leading to superior finishes in your woodworking projects.
People who want to read this article:
After Sanding: Preparing for Finishing
Cleaning the Wood Surface
- Removing Dust: After the final sanding, it’s imperative to remove all traces of dust for a clean finish. Use a tack cloth or a soft brush to gently wipe the surface.
- Vacuuming: For larger projects, a shop vacuum can effectively remove dust from the wood and the surrounding area.
- Final Wipe: A damp cloth can be used for a final wipe-down, but ensure the wood dries completely before applying any finish.
Choosing the Right Finish
- Type of Finish: The choice of finish (varnish, stain, paint, etc.) depends on the desired look and the type of wood. Consider the wear and tear the piece will undergo and the level of protection needed.
- Compatibility with Wood: Some finishes work better on certain types of wood. Research or consult with a professional to choose the best option for your specific project.
Applying the Finish
- Test First: Before applying the finish to the entire piece, test it on a small, inconspicuous area to ensure it gives the desired effect.
- Even Application: Use a brush, roller, or sprayer to apply the finish evenly. Follow the manufacturer’s instructions for the best results.
- Drying Time: Allow adequate drying time between coats. Rushing this process can lead to a less than satisfactory finish.
Sanding Between Coats
- Light Sanding: If applying multiple coats (especially with varnish or paint), a light sanding with very fine sandpaper (like 240 or 320 grit) between coats can ensure a smoother finish.
- Clean Up: After each light sanding, remove the dust thoroughly before applying the next coat.
By properly preparing your woodwork post-sanding and carefully applying the finish, you can enhance the durability and appearance of your project, ensuring a professional and long-lasting result.
Maintenance and Care of Sanding Tools
Caring for Sandpaper
- Storage: Keep sandpaper in a dry, clean place to prevent moisture damage and clogging. Organize by grit for easy access.
- Reusability: Some sandpapers, especially those designed for power sanders, can be cleaned and reused. Gently remove the dust with a soft brush or cloth.
Maintaining Power Sanders
- Regular Cleaning: After each use, clean your power sanders to remove dust and debris. This prolongs their life and ensures they work efficiently.
- Check Moving Parts: Regularly inspect for any wear and tear, especially on moving parts like bearings and belts in belt sanders.
- Lubrication: Some models may require occasional lubrication for smooth operation. Check the manufacturer’s instructions for specific maintenance guidelines.
Handling Hand Sanding Tools
- Sanding Blocks and Pads: Inspect for any signs of wear or damage. Replace them if they become uneven or lose their grip on the sandpaper.
- Cleaning: Clean sanding blocks and pads regularly to prevent buildup of dust and particles, which can affect their performance.
Tips for Tool Longevity
- Use Appropriate Grits: Avoid using overly coarse grits for delicate jobs, as this can wear out both the tool and the sandpaper faster.
- Even Pressure: Apply consistent pressure when sanding. Excessive force can damage both the tool and the surface, as well as reduce the effectiveness of the sandpaper.
- Rotate Sandpaper Regularly: On power sanders, rotate the sandpaper regularly to ensure even wear and prolonged use.
By properly maintaining your sanding tools and sandpaper, you can ensure they remain effective and reliable for all your woodworking projects, ultimately saving time and money.
Conclusion
Mastering the art of sanding is a cornerstone in the world of woodworking and DIY projects. Whether you’re refinishing an old piece of furniture, building something new, or simply looking to achieve a flawless finish, understanding the nuances of sanding is key.
Remember, the journey from coarse grits to fine is not just about smoothing a surface; it’s about refining your craftsmanship.
As we’ve explored, different types of wood require different sanding approaches, and the final application – be it paint, stain, or varnish – influences your sanding strategy.
Your choice of tools, from hand sanding blocks to advanced power sanders, will shape the efficiency and outcome of your work.


