When it comes to woodworking, the choice of wood significantly influences the final outcome of your project. One species that consistently captures the attention of craftsmen and DIY enthusiasts is birch.
Known for its robust durability and alluring grain patterns, birch wood presents a canvas of possibilities, especially when it comes to staining.
Staining birch wood, however, is not without its challenges. This article delves deep into the intricacies of birch wood staining, providing comprehensive insights to help you achieve that perfect finish.
Whether you’re a seasoned woodworker or a beginner, understanding the nuances of staining birch is crucial for your next project.
Why Birch? Birch wood, with its pale hue and fine, even grain, is a popular choice for furniture, cabinetry, and decorative pieces.
Originating predominantly from North America and Eurasia, its accessibility and aesthetic appeal make it a preferred material for various woodworking endeavors.
Overview of Birch Wood
Birch Wood Species: Birch belongs to the Betula genus and is renowned for its light, often pale yellow to light brown color, sometimes with subtle red or pink undertones.
Its even and straight grain bestows an elegant and sleek appearance, making it a favored choice for modern design.
Geographical Availability: Birch is widely found across North America and Eurasia. This widespread availability makes it a go-to option for woodworkers globally.

Characteristics of Birch Wood:
- Color: Typically pale yellow to light brown with possible red or pink undertones.
- Grain Pattern: Generally straight and uniform, contributing to its sleek look.
- Durability: Classified as a hardwood, birch is robust and resistant to wear and tear, ideal for high-use furniture.
Understanding these characteristics is crucial in mastering the staining process, as each aspect plays a role in how the wood will accept and interact with the stain.
The Challenges of Staining Birch Wood
Staining birch wood can be both rewarding and challenging. Due to its tight grain structure and density, birch is often less receptive to stains compared to other woods like oak or pine.
This can result in uneven absorption and blotchiness, which are common issues when staining birch.
Key Challenges:
- Uneven Absorption: Birch tends to absorb stain unevenly, leading to a blotchy appearance.
- Tight Grain Structure: The fine grain of birch can make it difficult for the stain to penetrate deeply.
Understanding these challenges is the first step in ensuring a successful staining project. In the next sections, we’ll explore how to prepare birch wood for staining and how to choose the right stain to mitigate these challenges.
Preparing Birch Wood for Staining
Proper preparation is paramount for achieving a successful stain on birch wood. This process is not just about cleaning the wood; it’s about creating the right conditions for the stain to be absorbed evenly.
Step-by-Step Guide to Preparing Birch Wood:
Initial Cleaning: Begin by ensuring the birch wood is clean and free of any dirt, dust, or grease. Use a tack cloth or a damp cloth to wipe down the surface.
Sanding: Sanding is crucial for opening up the wood’s pores and smoothing the surface. Start with a coarse-grit sandpaper (around 100-120 grit) to remove any rough spots or previous finishes. Progressively move to finer grits (up to 220 or 320 grit) for a polished finish.
- Always sand in the direction of the grain to avoid scratches.
- Between each grit, wipe the wood with a clean cloth to remove dust.
Inspect the Surface: After sanding, closely inspect the wood for any imperfections or missed spots. The more thorough you are during this stage, the more even your stain will be.
Clean the Wood Again: Once satisfied with your sanding, wipe the wood again with a tack cloth to ensure it’s completely free of dust.
Tips for Effective Preparation:
- Even Pressure: Apply even pressure while sanding to avoid creating depressions in the wood.
- No Rushing: Take your time with each step to ensure the best possible surface for staining.
A well-prepared piece of birch is more likely to accept the stain uniformly, leading to a more professional-looking finish.
Selecting the Right Stain for Birch

Choosing the appropriate stain is critical for birch wood. Different types of stains can react differently with birch, affecting the final appearance.
Types of Stains:
Water-Based Stains: Often recommended for birch due to their easy penetration and clean-up. They dry quickly and are less likely to cause blotching.
Oil-Based Stains: Provide a richer, deeper color but can be trickier to work with on birch. They take longer to dry, which can be beneficial for achieving more uniform color.
Choosing the Stain:
Test First: Always test the stain on a scrap piece of birch. This will give you an idea of the final color and how the wood reacts to the stain.
Consider the Project: Think about the end use of the project. For furniture or items that will be handled frequently, a durable, oil-based stain might be better.
The Staining Process
Applying stain to birch wood requires patience and attention to detail. Following a structured approach can make a significant difference in the final outcome.
Step-by-Step Staining Guide:
Applying the Stain: Use a brush, cloth, or sponge to apply the stain. Work in manageable sections and always go along with the grain of the wood. This ensures a smooth application and helps in achieving an even color.
Letting the Stain Penetrate: After applying the stain, allow it to penetrate the wood for a few minutes. The length of time will depend on the type of stain and the desired intensity of the color. Refer to the stain manufacturer’s instructions for guidance.
Wiping Off Excess Stain: Use a clean cloth to wipe off any excess stain. This step is crucial to prevent blotches and ensure an even coat.
Drying: Allow the stain to dry completely. Drying times can vary based on the type of stain and environmental conditions.
Applying Additional Coats: If a deeper color is desired, additional coats can be applied. Make sure to allow each coat to dry thoroughly before applying the next.
Key Points to Remember:
- Consistency: Apply the stain consistently to avoid darker spots or streaks.
- Testing: Always test the stain on a scrap piece or an inconspicuous area first.
- Ventilation: Work in a well-ventilated area to avoid fumes from the stain.
People who want to read this article:
- Pine vs Poplar for Woodworking Projects: An Expert’s Guide
- Poplar vs Oak: Which is More Appropriate for Your Project?
Finishing Touches
After staining, applying a finish or sealant is essential to protect the wood and enhance the stain’s appearance.
Types of Finishes:
- Polyurethane: Offers robust protection and is available in various sheens.
- Lacquer: Dries quickly and provides a durable finish.
- Oil Finishes: Enhance the natural look of the wood but offer less protection than polyurethane or lacquer.
Applying the Finish:
- Apply the finish using a brush or cloth, following the wood’s grain.
- Allow adequate drying time between coats, as recommended by the product.
- Lightly sand between coats for a smoother finish.
The right finish not only protects your project but can also bring out the richness and depth of the stained birch wood.
Advanced Tips for Mastering Birch Staining
Achieving a professional and uniform stain on birch wood can be challenging, but with these advanced tips, you can elevate your results to the next level.
Test on Scrap Wood: Always begin by testing your chosen stain on a piece of scrap birch. This allows you to see the actual color and make adjustments before applying it to your project.
Layering Stains: For a more complex or richer color, consider layering different stains. Apply one coat, allow it to dry, and then apply a second coat of a different shade. This technique can create unique, custom colors.
Sanding Between Coats: Lightly sand the wood between each coat of stain with a fine-grit sandpaper. This not only smooths the surface but also helps in achieving an even color.
Use a Pre-Stain Conditioner: Birch is known for its blotchy absorption of stains. Applying a pre-stain wood conditioner can help in achieving a more uniform stain distribution.
Protective Gear: Safety is paramount. Always wear gloves and a mask, especially when working with oil-based stains or if you’re sanding extensively.
Experiment with Techniques: Don’t be afraid to experiment with different application techniques like wiping, brushing, or using a sprayer, depending on the project’s complexity and the desired finish.
Frequently Asked Questions
Can I use any type of stain on birch wood?
Both water-based and oil-based stains can be used, but water-based stains are often preferred for their ease of application and consistent results.
How long should I wait between applying coats of stain on birch wood?
It’s crucial to allow each coat to dry completely, which typically takes a few hours. However, follow the manufacturer’s recommendations for precise drying times.
Does birch wood require special sanding techniques before staining?
Yes, thorough sanding is important. Start with a coarse grit and progress to finer grits for a smooth finish.
Can I mix different stain colors on birch wood?
Yes, you can mix different stain colors to create custom shades. Always test the mixture on a scrap piece first.
Special Considerations
When working with birch wood for staining, keep in mind the following:
- Outdoor Use: Birch is primarily used for indoor projects. If using outdoors, apply a suitable outdoor finish for protection.
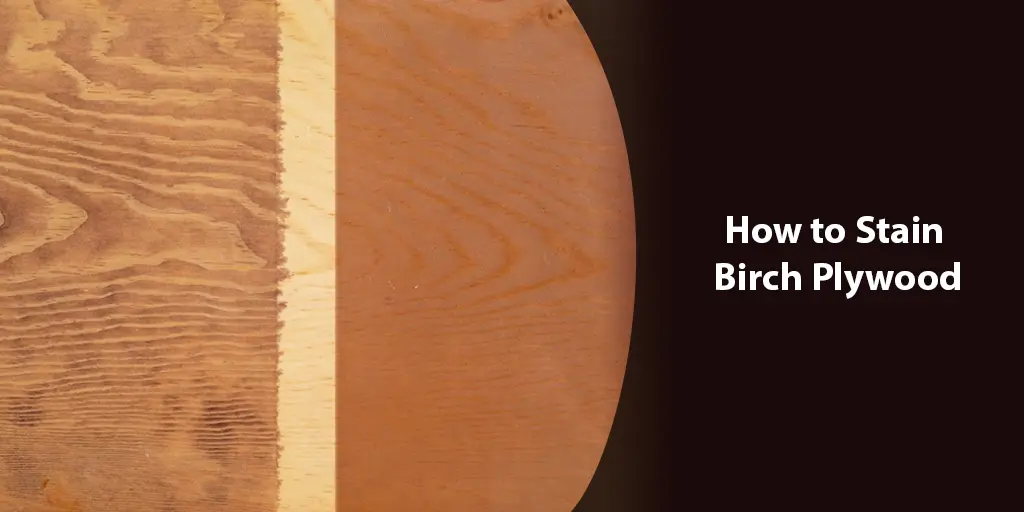
- Staining Birch Plywood: Birch plywood can be stained but may require different techniques due to veneer layers.
- Eco-Friendly Options: Look for water-based and low-VOC stains for a safer, environmentally friendly approach.
Conclusion
Staining birch wood, while challenging, can lead to stunning and durable finishes that enhance the natural beauty of this versatile wood.
By understanding the unique characteristics of birch and following the outlined steps and tips, you can overcome common challenges and achieve a professional-looking stain.
Remember, the key to successful birch staining lies in thorough preparation, careful selection of stains, and patient application.
Each step, from sanding to finishing, plays a crucial role in determining the final appearance of your project.
Experimentation and practice are essential in mastering the art of staining birch. Don’t be afraid to try different techniques, stains, and finishes to discover what works best for your specific project.
And most importantly, always prioritize safety by working in a well-ventilated area and using protective gear.
In conclusion, birch wood offers a canvas for creativity and craftsmanship. With the right approach, you can unlock its potential and elevate your woodworking projects to new levels of beauty and durability.
Embrace the challenge and enjoy the process of transforming birch into a masterpiece of color and texture.


")