Whether you’re a seasoned woodworker or just starting out, lacquer is an indispensable finish that can enhance the beauty and protect the integrity of your projects.
As an expert in wood finishing, I’m here to share my knowledge on the technical application of lacquer coats to ensure you achieve the results you want.

Lacquer has been used for centuries by furniture makers, cabinet builders and wood artisans to create stunning, durable surfaces.
A fast-drying finish, lacquer creates a beautiful high-gloss sheen and hard protective shell that highlights the natural grain and color of the wood.
It is also highly repairable, making it suitable for high-traffic areas that may experience wear over time.
In this comprehensive guide, I will walk you through the process step-by-step using clear, easy-to-understand language.
We will look at the different types of lacquer available and their unique properties and uses. I will cover proper wood preparation techniques and factors to consider when applying multiple coats.
You will also learn optimal drying conditions, common pitfalls to avoid, and maintenance best practices.
By the end, you will have a solid understanding of how lacquer works and be empowered to confidently tackle any wood finishing project to achieve your desired lacquered result.
Let’s get started on the technical explanation of determining the right number of lacquer coats for any wood surface.
Lacquer Types
When it comes to lacquer, there are three main types to choose from – oil-based, water-based and nitrocellulose.
As an experienced wood finisher, I want to ensure you have the knowledge needed to select the best one for your unique project requirements.
Oil-based lacquer is my personal favorite. It dries very hard and is exceptionally durable, making it suitable for high-traffic surfaces that will endure daily wear and tear, like tabletops. The downside is it is flammable and emits strong odors during curing.
Water-based lacquer has gained popularity in recent years due to its lower toxicity compared to oil-based.
It dries faster and contains no hazardous VOCs, so it is better for enclosed interior spaces. However, it does not cure as hard and may show minor indentations over time.
Nitrocellulose lacquer, also known as nitro lacquer, provides the highest sheen and clearest finish. It is compatible with most stains and dyes, allowing for transparent and vibrant color results. Be aware it is highly flammable and safety precautions must be followed.
Preparing the Wood
Proper substrate preparation is essential for lacquer to perform at its best. As a wood finishing expert, I will walk you through the best practices to get your surface ready.
We will start with sanding. Whether using coarse then fine-grit paper or progressing through multiple grades, the goal is to abrade any mill glaze and create microscopic tooth for optimal adhesion. Pay special attention to endgrain.
Staining is optional but can enhance features like grain patterns. Used correctly, it yields beautifully rich colors. I’ll cover techniques for achieving uniform, appropriate saturation.
Next is sealing. While not always necessary, it helps stabilize the wood and promote a smoother lacquer finish. Common sealers and their benefits will be outlined so you can pick the best option.
With complete surface preparation comes high quality, long-lasting results. Follow my expert guidance and you’ll be ready to move forward in the application process with confidence that your surface will accept the finish properly.
Whether you’re refinishing furniture or building a new project from scratch, the time invested here pays off.
Applying Lacquer
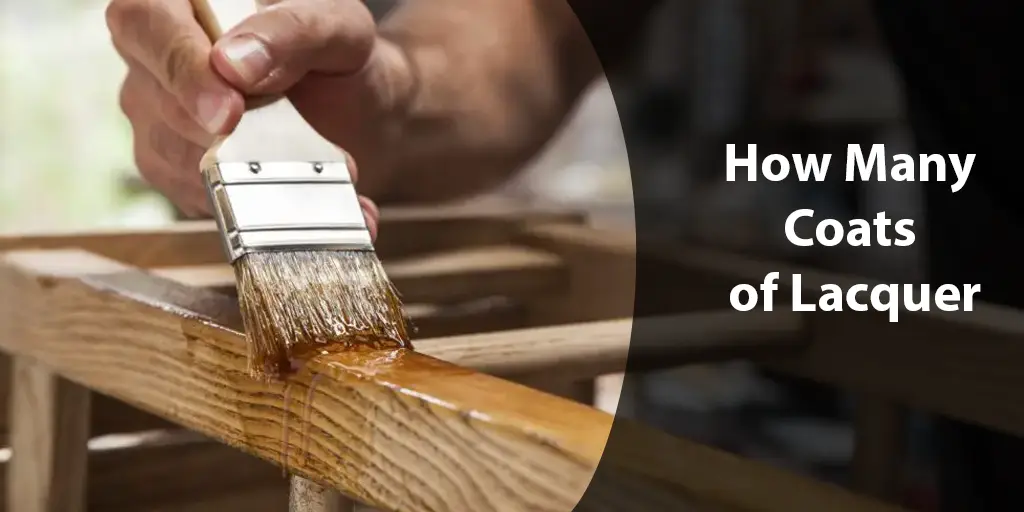
Now that the surface preparation work is complete, it’s time to apply our first layer of lacquer. As an expert in wood finishing, I want to carefully explain the application steps for achieving optimal results.
We have two primary options when it comes to applying lacquer – brushing and spraying. While brushing allows for excellent control, spraying is faster and provides a smoother finish when done correctly. I’ll walk through the pros and cons of each to help you decide.
Regardless of method, you’ll need to determine how many coats are appropriate. A few key factors exert influence here. Personal aesthetics like sheen level and protection requirements are priorities to consider. Meanwhile, wood characteristics and porosity properties must be assessed.
Don’t forget standard industry guidelines, which my expertise has found provide a reliable baseline. But the number and order of techniques also play a role. Later I will outline specialized techniques and how they impact coating layers.
Applying lacquer takes practice to develop muscle memory. Have no fear, as your personal wood finishes consultant, I will ensure you feel completely comfortable with the application process before moving forward. Just let me know if you need any clarification or have additional questions.
With the right tools and techniques, you’ll be able to confidently apply a beautiful basecoat that will only improve as additional layers are added.
Environmental Factors
As a wood finishing expert, I want to stress that environmental conditions can significantly impact your lacquer application process and results.
It’s important to have the right context so you can anticipate and adjust for these influence factors.
Humidity is a key one. Too much moisture in the air will prevent lacquer from drying properly, which leads to issues like blushing or amine blush. Maintaining an ideal 30-50% range during the curing time is best.
Temperature also plays a vital role. Warmer surfaces and spaces will cause faster drying, which increases likelihood of imperfections forming. Cooler temperatures below the recommended 65-80°F optimal span is problematic too.
Dust is an environmental element to carefully control. Even microscopic amounts landing on a wet coat could create disruptions. Be sure to apply lacquer away from dusty areas or create a clean work space.
Other considerations include ensuring adequate airflow and elimination of drafts that may compromise evenly drying coats. I’m here to offer expert advice tailored to your specific climate and application conditions.
Remember, the choices you make regarding the environmental circumstances when applying lacquer can make or break your finished results. Armed with this knowledge, you’ll be empowered to anticipate and avoid common problems.
Finishing and Drying
Now that the final coat of lacquer has been applied, it’s time for the critical finishing and drying phase. This is where my experience as a wood finishing expert can help ensure optimal results.
First, we’ll examine the best drying methods according to the specific lacquer used. From airflow and heat control to humidity levels, we’ll detail the ideal environmental settings to properly cure each type.
Curing time is another essential point. All coatings require time to fully harden and crosslink, but drying times can vary greatly between products – from hours to days. Understanding typical durations and how to accelerate or slow the process is important.
Finishing techniques like sanding and polishing also impact the final visual aesthetic and durability. I’ll outline methods commonly employed after the protective coating has cured, such as burnishing for a ultra-gloss look and feel.
Lastly, we’ll discuss how final appearance factors like sheen level relate to both the number of coats applied and finishing steps. My expertise has found certain methods optimize various characteristics.
Following my expert guidance on proper post-application procedures will ensure your lacquered project reaches its full potential. The finishing touches are what elevate a coating from functional to a beautiful surface to enjoy for years to come.
Durability and Aesthetics
Aesthetics and durability are where lacquer really shines – when applied correctly using expert techniques, of course. Let me explain how these factors are influenced by proper application methods.
The number of coats has a direct correlation to protection capabilities. Additional layers build up thickness for resistance to wear, chemical exposure, impact, slicing and more. I’ll provide data-backed guidelines for optimum defense.
Surface hardness is another form of durability, and refined application techniques maximize this property.
From blending to proper curing, tight control at each stage results in an incredibly durable, long-lasting finish.
Aesthetics are enhanced through layering as well. Deeper staining, richer color, smoother sheen and a wet-look pop with multiple applications.
Visual interest is elevated when methods optimize transparency and substrate features.
I’ll also explore how post-application actions like sanding between coats and applying toner or topcoats can boost the attractive qualities.
These final polishing steps at the macro and micro level make a noticeable difference.
Armed with an understanding of what dictates beauty and strength over the long run, you’ll feel empowered to execute an expert multi-layer lacquer job from preparation through to completion. Durable protection paired with visual appeal is achievable!
Maintenance
Achieving a beautifully finished lacquered surface is just the beginning. As an expert consultant, I want to ensure you also understand proper maintenance practices to protect your investment long-term.
We’ll start with routine cleaning methods. Gentle dusting and gentle eco-friendly cleaners will remove daily residue without harming the coating. I’ll outline application techniques and appropriate products.
Inevitably minor flaws do occur over time. I’ll teach repair strategies for common concerns like scratches using spot-filling techniques or touch-up methods for small nicks. Quick response prevents lasting effects.
More serious damage may require complete refinishing. That’s why it’s important to understand re-coating processes, from surface prep through curing.
Armed with this expert knowledge, refurbishing to the original like-new state is non-intimidating.
With maintenance procedures, your lacquered surfaces can withstand years of continual use and abuse. But it requires understanding the right remedies and procedures. Trust my experience to guide you so your beautiful finish is preserved.
My goal is to provide comprehensive information to keep your lacquered wood looking its best through any challenges.
Conclusion
I hope you’ve gained valuable expertise and insight into the technical lacquering process from start to finish by working through this comprehensive guide.
My aim as your wood finishing consultant was to empower you with confidence in this versatile material.
Let’s quickly review the key lessons. We started with the importance of lacquer and its varieties. Proper preparation techniques like sanding, staining and sealing were outlined.
Expert guidance covered application methods, environmental considerations, and finishing for optimal results.
You learned Lacquer’s influence on aesthetics and durability when multiple coats are expertly applied.
Finally, important maintenance best practices ensured protection of your beautiful lacquered surfaces long-term.
Whether you’re refinishing a treasured heirloom piece or crafting a new showpiece from raw lumber, I believe I’ve equipped you with the working knowledge to tackle any wood finishing lacquering project successfully. But my role as your consultant does not end here.


