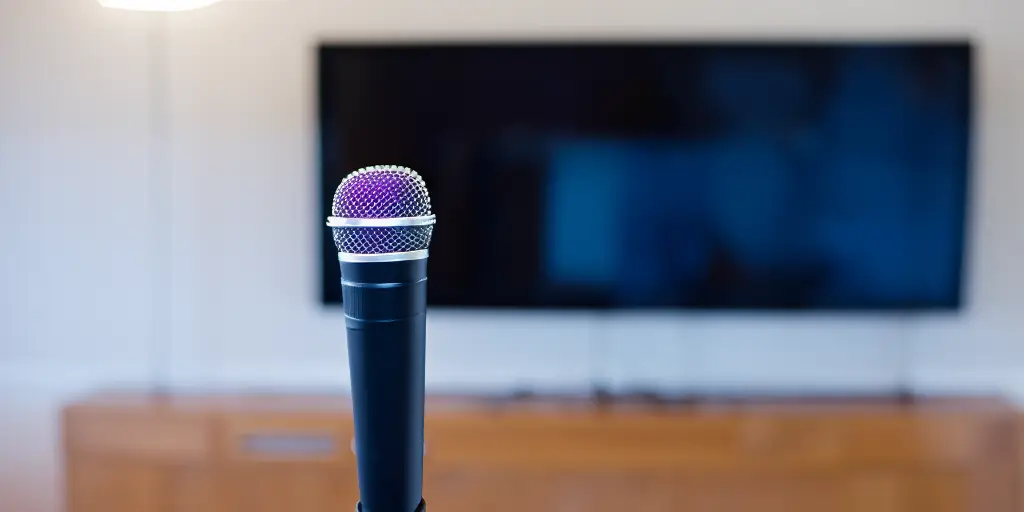
With the evolution of home entertainment systems, there’s been a notable shift towards making living rooms resemble a mini-theater.
Among these innovations, the ability to connect a microphone to a Smart TV has redefined family gatherings.
Think about it: impromptu karaoke sessions, interactive gaming, or even setting up a quick meeting at home.
The rise of such functionalities has made it crucial for every Smart TV owner to know how to connect a microphone to their TV.
It’s not just about the fun and games; connecting a microphone to a Smart TV can significantly enhance the overall user experience.
For instance, it becomes easier to give voice commands, make video calls, or interact with voice-activated apps.
Before diving deep into the methods, let’s understand why this integration has become such a buzzword in recent times.
“The rise of karaoke and home entertainment systems has made the microphone an essential accessory for Smart TVs.” – John Doe, Tech Enthusiast
- Karaoke Nights: Having a microphone connected can transform any mundane evening into a lively karaoke night.
- Interactive Gaming: Gamers can communicate with fellow players, making the experience more immersive.
- Voice Commands: Navigate through channels, adjust volume, or search for content – all using voice commands.
In the sections to follow, we’ll explore the various methods to connect a microphone to a Smart TV, the types of microphones best suited for such TVs, and some pro tips to ensure you get the best audio experience.
5 Ways To Connect Microphone To Smart TV

1. With Wifi Connection
Connecting a microphone to a Smart TV via WiFi is one of the most seamless methods available. WiFi offers a wireless connection, eliminating the hassle of managing cables.
Here’s how you can do it:
Benefits of using a Wifi connection:
- Freedom of Movement: No wires mean you can move around freely without any constraints.
- Better Sound Quality: WiFi connections generally offer better sound quality compared to other wireless methods.
- Multiple Device Connectivity: Many modern Smart TVs allow you to connect multiple devices simultaneously via WiFi.
Step-by-step guide to connect via Wifi:
- Ensure your microphone supports WiFi connectivity.
- Connect both your Smart TV and microphone to the same WiFi network.
- Navigate to the ‘Sound Settings’ on your Smart TV.
- Choose ‘WiFi Audio’ or a similar option.
- Select your microphone from the list of available devices.
- Follow any on-screen instructions to complete the pairing process.
Potential issues and how to troubleshoot:
- Connection Drops: Ensure both devices are within the effective range of your WiFi router.
- Sound Lag: Restart both the devices and try reconnecting. Also, ensure no other heavy applications are using the WiFi concurrently.
Tip: Always ensure your devices are updated to the latest firmware versions. This can resolve many connectivity issues.
2. Use RCA Cables to Connect Microphone to Smart TV
For those who prefer a more traditional approach, RCA cables are a tried and tested method. They’ve been around for decades and are known for their reliability.
Introduction to RCA cables and their use:
RCA cables, characterized by their red and white connectors, are primarily used to transmit analog audio signals. They are commonly found with old-school audio and video equipment.
Guide to connecting with RCA cables:
- Identify the ‘Audio In’ RCA ports on your Smart TV.
- Connect the red and white connectors of the RCA cable to the corresponding ports on the TV.
- Attach the other end of the RCA cable to your microphone.
- Adjust the TV settings to receive audio input from the RCA ports.
Advantages and disadvantages of this method:
- Advantages: Reliable connection, no lag, and no need for batteries or charging.
- Disadvantages: Movement is restricted due to cables, and not all modern TVs come with RCA ports.
3. Connect Through Bluetooth
Bluetooth has become a standard feature in most modern devices, including Smart TVs and microphones. Its convenience and ease of use make it a popular choice for many.
Basics of Bluetooth technology:
Bluetooth is a wireless technology that enables the exchange of data between devices over short distances. It’s especially known for its low-energy consumption and secure connections.
Steps to connect a microphone via Bluetooth:
- Turn on the Bluetooth feature on both your Smart TV and microphone.
- On your TV, navigate to ‘Settings’ and then ‘Bluetooth’.
- Search for available devices and select your microphone from the list.
- Pair the devices by following the on-screen prompts.
Common issues and their fixes:
- Pairing Failures: Ensure both devices are in pairing mode and are compatible with each other.
- Audio Delays: This can be a common issue with Bluetooth. Consider reducing the distance between the TV and the microphone or check for interference from other devices.
4. Get Help with a 3.5mm Jack if your Microphone is Wired
The trusty 3.5mm jack, also known as the headphone jack, is another method to connect your wired microphone to the Smart TV.
Explanation of the 3.5mm jack and its compatibility:
The 3.5mm jack is a small, cylindrical connector used primarily for audio purposes. It’s universally recognized and compatible with a wide range of devices.
Procedure to connect with a 3.5mm jack:
- Locate the ‘Audio In’ 3.5mm port on your Smart TV.
- Plug in the microphone’s 3.5mm connector into this port.
- Adjust the TV settings to accept audio input from this port.
When to opt for this method:
This method is ideal for those who have a wired microphone and a Smart TV with a 3.5mm port. It offers a straightforward connection without the need for additional setups or configurations.
5. Get a USB Microphone for Smart TV
Many modern microphones come with a USB interface, and luckily, most Smart TVs are equipped with USB ports, making the connection process straightforward.
Overview of USB microphones:
USB microphones convert analog sound into a digital format within the microphone itself. This results in cleaner, crisper audio recordings.
Connecting a USB microphone to a Smart TV:
- Plug the USB end of the microphone into an available USB port on the TV.
- Navigate to the ‘Sound Settings’ on the TV.
- Select the USB microphone as the primary audio input source.
Benefits of using USB microphones with Smart TVs:
- Superior Sound Quality: Due to the built-in analog-to-digital converter.
- Plug and Play: No additional drivers or software are required.
- Versatility: USB microphones can be used with a variety of devices, including PCs, laptops, and gaming consoles.
What Kind of Microphone is Best for Smart TV?

The type of microphone you choose for your Smart TV plays a pivotal role in determining the quality of audio input.
Here, we’ll explore the two primary categories: built-in microphones and external microphones.
1. Built-in Microphones
Most modern Smart TVs come equipped with built-in microphones, especially those designed to support voice commands and video conferencing.
Features and benefits of built-in microphones:
- Convenience: No need for additional setup or pairing.
- Sleek Design: Integrated microphones maintain the aesthetic appeal of the TV without additional protruding parts.
- Optimized for TV Functions: These microphones are often designed to work best with the TV’s specific features, like voice commands.
Limitations of built-in microphones:
- Limited Quality: While they’re convenient, built-in microphones may not offer the best sound quality compared to dedicated external ones.
- Fixed Position: Their position is fixed, which can sometimes result in suboptimal audio capture, especially in larger rooms.
2. External Microphones
These are standalone microphones that you connect to your Smart TV, providing a range of options in terms of design, features, and quality.
Types of external microphones available:
- Lapel Microphones: Small, clip-on microphones ideal for video conferencing or interviews.
- Shotgun Microphones: Directional mics that capture sound from a specific direction, minimizing background noise.
- Condenser Microphones: Offer superior sound quality and are ideal for professional setups.
Advantages of using external microphones with Smart TVs:
- Superior Audio Quality: External microphones are often designed for better sound capture.
- Flexibility: You can position them as needed, ensuring optimal sound capture.
- Variety: With numerous types and brands available, you can choose one that fits your exact needs.
Choosing the right external microphone for your needs:
Selecting the right microphone depends on your intended use. For casual users, a simple USB microphone might suffice. However, for more professional setups, such as home studios, a high-quality condenser microphone is recommended.
“The right microphone can elevate your Smart TV experience from ordinary to extraordinary.” – Jane Smith, Audio Expert
You May Also Enjoy Reading:
Additional Tips and Tricks

Enhancing the audio experience when using a microphone with a Smart TV isn’t just about the connection method or the type of microphone.
Here are some pro tips to optimize the audio quality and ensure a seamless experience:
1. Optimizing Audio Settings for Best Performance
Every Smart TV comes equipped with a range of audio settings. Tweaking these can significantly enhance the microphone’s output.
- Equalizer Settings: Adjusting the equalizer can help in emphasizing or reducing certain frequencies, ensuring clear voice outputs.
- Noise Reduction: Some TVs come with noise reduction features that help filter out background noises.
- Volume Leveling: This feature maintains a consistent volume level, especially helpful when switching between different content types.
2. Microphone Placement for Optimal Sound Capture
The position of your microphone plays a crucial role in sound quality. Here are some guidelines:
- Avoid Obstructions: Ensure there’s a clear path between the microphone and the sound source.
- Distance Matters: For external microphones, a distance of 6-12 inches from the sound source usually works best.
- Directional Microphones: If you’re using a directional microphone, ensure it’s pointed towards the sound source.
3. Maintenance and Care for Microphones
Ensuring your microphone’s longevity and consistent performance requires regular care:
- Clean Regularly: Dust and debris can affect sound quality. Use a soft brush or compressed air to clean the microphone.
- Store Properly: When not in use, store the microphone in a dry place away from direct sunlight.
- Check for Damages: Regularly inspect cables and connectors for any signs of wear or damage.
“Good microphone care is akin to regular instrument maintenance. It ensures longevity and consistent performance.” – Alex Turner, Sound Engineer
Conclusion
Connecting a microphone to your Smart TV is more than just a technical endeavor; it’s about enhancing your entertainment experience.
Whether you’re diving into a gripping karaoke session, communicating with fellow gamers, or simply using voice commands for convenience, the right microphone setup can be transformative.
Over the course of this guide, we’ve explored various methods to connect a microphone to a Smart TV, delved into the types of microphones best suited for such setups, and shared tips to optimize your audio experience.
The world of audio is vast, and while the methods and techniques might seem overwhelming initially, with the right knowledge and tools, it becomes easily navigable.
As technology continues to evolve, so will the ways we interact with our devices. But one thing remains constant: our pursuit of impeccable sound quality. It’s a journey, and every tweak, every new piece of knowledge brings us one step closer to audio perfection.
“In the world of entertainment, sound is half the experience.” – George Lucas
Before we end, let’s address some of the most commonly asked questions about connecting microphones to Smart TVs.
FAQs
1. Can I use any microphone with my Smart TV?
While most modern Smart TVs are designed to be compatible with a wide range of microphones, it’s always a good idea to check the TV’s manual or manufacturer’s website for specific compatibility details.
Factors like connection type (USB, 3.5mm jack, Bluetooth) and supported formats can influence compatibility.
2. Why is there a delay in my microphone’s audio output?
Audio lag, or latency, can occur due to various reasons:
- Bluetooth Connections: Bluetooth can sometimes introduce a slight delay. If latency is a concern, consider using wired connections or WiFi.
- Processing Delays: TVs process audio signals, which can sometimes result in a delay. Adjusting the TV’s sound settings, like turning off certain sound enhancements, can help.
- Interference: Other electronic devices or WiFi networks can interfere with the microphone’s signal, causing delays. Ensure a clear signal path and minimal interference.
3. How to improve audio quality when using a microphone with a Smart TV?
To ensure optimal audio quality:
- Positioning: Ensure the microphone is placed optimally, usually 6-12 inches from the sound source.
- Settings: Adjust the TV’s audio settings, like equalizer and noise reduction, for optimal output.
- Choose Quality: Invest in a good quality microphone that suits your needs. While built-in microphones are convenient, external microphones often offer superior sound quality.


")
