Whether you’re a woodworking professional or homeowner tackling a DIY project, it’s important to properly maintain and restore wood surfaces over time.
Danish oil is a popular choice for protecting and enhancing wood grain, but knowing how to safely remove it is a key part of the wood finishing process.
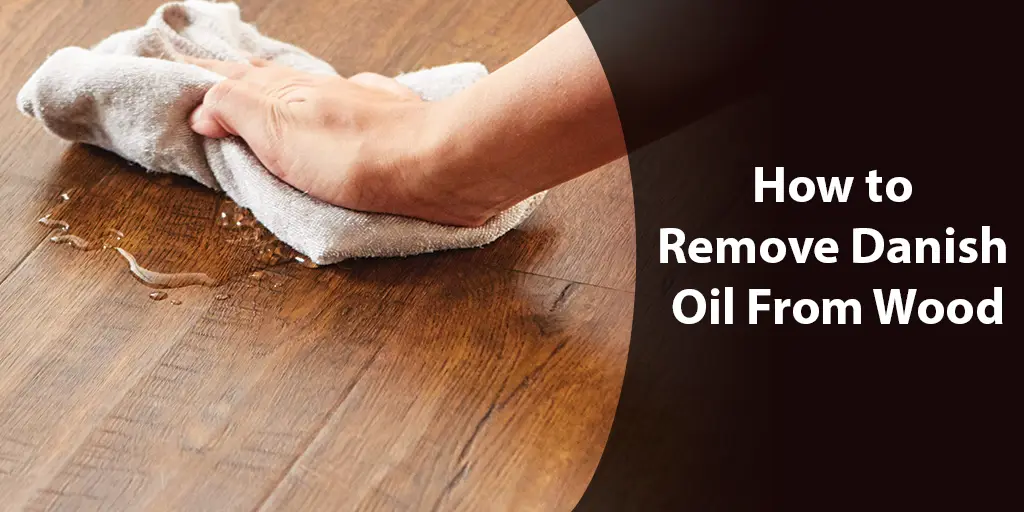
In this comprehensive guide, we’ll unveil the secrets to successful Danish oil removal through a methodical, step-by-step approach.
To begin, let’s start with an overview of Danish oil itself. Simply put, Danish oil is a blend of natural oils that penetrates deep into wood pores to provide moisture resistance and bring out the natural beauty of different wood types.
Containing ingredients like linseed oil and mineral spirits, it creates a durable yet breathable seal for indoor and outdoor wood use.
While effective for its intended purpose, Danish oil must be periodically stripped and reapplied to maintain the wood’s integrity over the long run.
We’ll then discuss why proper Danish oil removal is so important. Left unchecked, residual oil buildup can clog the wood’s ability to “breathe” and leave an undesirable hazy or clouded effect. It also prevents the adhesion of new finishes.
By following careful best practices, you can safely renew the wood surface and restore its natural appeal. We’ll examine the signs that indicate when it’s time for removal as well as evaluate the current wood condition.
Through a confident yet straightforward approach, this guide aims to provide a reliable framework for tackling any Danish oil stripping project with success.
By understanding the different methods, tools, and characteristics of various wood types, you can feel knowledgeable about selecting the right removal technique.
Preparation for Removal
With the importance of proper Danish oil removal established, let’s dive into preparing the wood surface. The first step is to accurately assess when stripping is necessary. Over time, exposed Danish oil will begin to darken or develop a faded appearance as it breaks down.
You may also notice residue buildup in grooves or a clouding effect that diminishes the wood’s natural aesthetic.
Don’t assume removal is needed solely based on age. Carefully inspect the entire wood area with an experienced eye. Run your fingertips along the grain to feel for any residual stickiness.
Use a clean cloth dampened with mineral spirits to wipe small test spots—if the oil transfers clearly, it’s time for stripping.
Next, we’ll evaluate the current condition of the wood itself. Sand any rough or damaged areas to smooth them out before starting. Take note of any soft or problem spots that may require extra care.
Knowledge of the specific wood type, whether it’s a hardwood like oak or softwood like pine, is also critical. Each responds differently during the removal process.
With the signs of needed removal identified and an assessment of the wood surface complete, we’ve laid the proper groundwork for success.
Understanding these preparation fundamentals sets the stage for you to confidently select and carry out the right Danish oil stripping method. Let’s move our discussion to the essential materials and tools required at each phase of the project.
Materials and Tools
Now that we’ve prepared the wood, let’s cover the important materials and tools needed to safely and effectively remove Danish oil. Proper protection is paramount, so respirators, gloves, and eye protection suited for chemical and dust exposure are essential.
A high-quality respirator bearing an NIOSH approval rating will offer the most reliable breathable protection.
A variety of stripping and sanding tools may be required depending on the chosen method. Standard options include chemical stripper scrapers, steel wool, orbital sanders, and screens or papers ranging from coarse 60-grit to fine 220-grit. Rags, mineral spirits, and clean water are likewise staples for dissolving and wiping away residue.
Additional supplies geared for heat methods involve torch kits or heat guns. Careful application is key, so temperature-control dials aid your precision. Padded protection like calfskin mitts are advisable for handling hot surfaces.
For evaluating stubborn spots, a bright work light is handy. Tackling stubborn crevices may mean equipping specialty tools like putty knives or worn-out credit cards.
Having reinforcements such as spare sandpaper assortments lets you efficiently change-out as needed.
Armed with the right protective gear and versatile collection of tools, you can feel knowledgeable about applying any technique confidently and safely.
Proper preparation leaves no question that you’re fully equipped to unveil the wood’s natural beauty through smooth, even removal of its Danish oil veil. Let’s progress our discussion to selecting the ideal method.
Removal Methods
We’ve now set the stage for success through preparation of the wood surface and gathering of necessary supplies. At this stage, it’s important to select the removal method best suited to the job at hand.
The three main options involve use of chemical strippers, sanding techniques, or applying controlled heat.
Let’s examine these approaches. Chemical strippers work quickly by breaking down oil compounds for effortless wiping away. Although convenient, certain formulas pose toxicity risks so following protective measures is critical.
Sanding provides a low-cost solution using abrasives to manually or mechanically grind off oil. It requires more elbow grease but allows precision targeting of hard-to-reach areas.
Heat application is growing in popularity as an eco-friendly choice when wielded responsibly. By gradually warming the wood, heat literally draws out embedded oil to the surface for easy wiping.
With a steady hand and temperature control, this technique can remove buildup without harming delicate grains. As with any method, practice and patience are paramount.
Removal mechanisms aside, your confidence level and project constraints will primarily dictate the best selection.
Larger, flat exterior surfaces may suit chemical strippers while intricate interior carvings necessitate the care of fine-grit sanding. Combining approaches can work stubborn buildup too.
Armed with a knowledgeable overview of these options, you can feel confident identifying the technique or blend thereof that suits your abilities and desired outcome.
In upcoming sections, we’ll outline each method’s step-by-step processes to unveil success. For now, let’s continue delving into selecting the right approach.
Removal Instructions
We’ve now gained a solid foundation in preparation, materials, and selection of the appropriate removal method. At this stage, it’s important to review step-by-step instructions for carrying out each technique to the highest standard.
Whether using chemical strippers, sanding practices, or controlled heat application, following meticulous guidelines is key to a flawless, safe result.
Let’s start with chemical strippers. Proper protective measures should always be the first order of business. After masking off any surface areas to avoid, carefully pour or brush on the gel or cream stripper per product instructions.
Allow the specified dwell time for deep permeation before checking for loosened oil with a rag. Repeat dissolving cycles as needed, taking care not to allow residues to dry on the wood. Neutralizing wash steps are likewise critical for safety.
For sanding removal, use a combination of coarse-grit breakdown and successively finer grits for smoothing. Work in sections and with the grain to avoid scratching. Frequently wipe away dissolved oil residues between sanding strokes.
Power tools require delicate techniques to retain hand feel for grain direction and problem spots. Heat method removal follows analogous protective preparation before carefully warming targeted areas as oilypools surface for easyremoval.
Now empowered with step-by-step instructions, you can feel knowledgeable taking on Danish oil removal with confidence.
Tailoring the best methodology to each unique wood material awaits your capable hands. Let’s proceed to examining wood type particulars.
Troubleshooting Challenges
Even with careful planning and execution of the chosen removal method, some trouble spots may arise that require problem-solving skills.
No two wood surfaces are identical, so willingness to adapt techniques for challenge areas builds confident mastery. In this section, we’ll address common issues and solutions to overcome unexpected hurdles.
Stubborn oil buildup in dense grain or crevices often requires combining stripping approaches or custom tool improvisation.
Rotary tools fitted with stripped wire brushes gently loosen caked residues without marring the wood. Substituting citrus-based strippers for increased dwell times works some hard cases too.
Should streaking, clouding or discoloration persist, carefully progressing finer grits or a repeat polish with steel wool or heat often does the trick.
Keeping rags changed and surfaces clean prevents wipes from redepositing elsewhere. Bright lighting helps discern remaining spots for targeted attention.
Intercoat adhesion issues sometimes necessitate complete removal rather than reapplication over residues.
Ensuring all areas feel silky smooth through the hand eliminates tackiness. A final wipe with acetone absolutely guarantees surfaces are film-free.
Armed with a knowledgeable process for troubleshooting, confidence replaces frustration when challenges arise.
This ability to adapt strategically and learn from obstacles sets professionals apart from well-meaning DIYers. Let’s proceed to the wood’s next stage of conditioning.
Conditioning Post-Removal
Now that the wood surface has been fully stripped of Danish oil residue through cautious application of the chosen method, it’s time to properly condition the bare material for a fresh protective finish.
This stage ensures the wood grain’s natural beauty shines through the new coating as intended without issues down the line.
First, any fine scratches from heavy grit sanding must be removed through a final polishing pass with smooth steel wool.
This step readies the surface at a microscopic level. As with previous efforts, keep a clean rag handy to continuously wipe away debris.
Pay close attention now todiagnosing problem zones that may require specially addressing. Patching splits with tinted filler enhances appearances.
Light sanding equalizes raised grain in porous woods like oak prior to final cleaning.
A mineral spirits dampened rag is your go-to tool for dust removal at this point while also testing intercoat adherence one last time. Any surface not feeling silky-smooth should be re-sanded slightly.
Conditioning with products like wood toners remedies discoloration before resealing and brings out natural colors. Proper preparation feeds confidence that the new topcoat will cure smoothly and lastingly.
By following these guidelines, you can emerge from wood restoration with capable hands and a surface primed for protection with rich character. Conditioning closes the loop on successful Danish oil removal.
Alternative and Combination Methods
While the standard removal techniques provide reliable solutions for most DIYers and pros alike, some stubborn residue cases merit exploring alternative or combined approaches.
Where confidence may have faltered with one technique alone, openness to flexible problem-solving often unveils success.
For example, persistently clouded grain may respond best to a mini-course of stripping instead of brute force.
Start with a quick chemical bath focused only on problematic spots, then polish with fine-grit sanding. The dual method thin slices away deposits delicately.
Heavily carved adornments that posed safety risks with strippers can be carefully wiped with pure acetone between heat-licensed draining cycles.
Evaporation does the work gradually without risk of over-application.
Grooves sometimes demand creative tool hybrids like abrasive-wrapped credit cards. Come armed with a roll of multi-texture garnet paper to contour unexpected contours precisely as the days’ oil accumulates.
Willingness to thoughtfully combine or modify techniques based on experience builds knowledgeable virtuosity.
True confidence emerges from embracing flexibility needed to solve the unexpected with nuance. Alternative approaches keep even long-time pros learning.
By maintaining an open yet analytical mindset, any wood restoration challenge presents an opportunity to unveil new heights of capable mastery. Adaptability remains the name of the game.
Eco-Friendly Options
As environmental stewardship grows in priority worldwide, exploring sustainable alternatives for wood restoration holds value.
Those striving for lower impact methods can feel confident green replacements yield quality results when applied judiciously.
Water-based chemical strippers containing plant-derived solvents break down residues effectively while safer for applicators and the environment. Look for products validated by certifying agencies.
Citrus-based cleaners provide natural degreasing using d-limonene from oranges. Though slower, repeat cleaning cycles combined with warm vinegar soaks loosen buildup gradually without noxious fumes.
For tougher jobs, mayonnaise or nuts oils cut through residues when applied as a paste left to sit. Both contain fatty acids that weaken Danish oil’s polymer bonds for peeling away.
Applying heat method principles with an infrared lamp powered by renewable energy achieves deep-penetrating removal through conduction without fuel emissions. Precise temperature control remains key.
Seeking local woodworking groups exposes options from sustainable pros, like reusable natural claybothextraction.
Confidence blossoms exploring techniques preserving both wood integrity and the planet. With nuance and care, eco-deeds need not outweigh functionality.
Considerations by Wood Type
Now that we’ve covered removal methods and techniques, it’s important to gain knowledgeable insights into how different wood types affect the process.
Factors like density, grain structure and response to moisture impact choice of tools and techniques. Realizing each material’s nature builds confidence in crafting adaptive strategies.
Softwoods like pine contain more widely spaced grains that soak up oil deeply but release it readily with the right gentle persuasion.
Heat transfers evenly through their cellular composition. Hardwoods necessitate more finesse, as tight-grained oak and walnut demand meticulous attention to prevent scuffing or pulls.
Reactive woods like red oak will require prompt conditioning post-removal to stabilize colors before sealing.
More stable species give seasoned hands flexibility to address membershipperform operat by Tammy. operate scenarios piecemeal over several days as needed.
Understanding characteristics like open versus closed grains is key. HardClosed grains demand selective stripping one small area at a time dot avoid redepositing back into the sealed grains.
Confidence arises from willingness to learn no material yields results identically. Adapting tools to unique textures unleashes any wood’s natural beauty through these practiced, knowledgeable lens.
Summary of Key Steps
We’ve covered a comprehensive overview of methods, materials, techniques and tutorials to impart knowledgeable mastery of Danish oil stripping.
But in closing, let’s concisely summarize the core steps to feeling confident in any removal project from start to finish.
First and foremost, proper preparation is key – inspect for signs of needed stripping, scan for problem zones, and equip safety gear beforehand.
Selecting the method best matched to wood material, surface particulars and individual skills leverages success.
Chemical strippers require protective handling, thorough residue dissolving, and neutralizing washes.
Sanding follows a systematic progression through finer grits with diligent debris removal between. Heat method warrants close temperature control and patience as warmth draws out deposits.
Troubleshooting challenges comes with thinking creatively – blending approaches often generates solutions. Post-stripping conditioning like grain equalizing and patching leave surfaces flawlessly primed.
Regardless of approach, meticulous removal instructions and always respecting wood’s unique properties set the stage for a polished, long-lasting refresh.
With sufficient practice, Danish oil stripping mastery arises from confidence in foundational preparation combined with flexibility in overcoming obstacles to emerge capable.
Armed with knowledge from this guide, any furniture restoration project now awaits your experienced hands.
FAQs
To conclude our discussion on achieving confident mastery of Danish oil stripping methods, let’s address some frequently asked questions that might arise during the planning stages:
Q: Can I remove Danish oil without stripping the entire wood surface?
A: With the right technique and care, yes it’s possible to selectively remove oil from problem spots alone. Just ensure complete dissolution with minimal surrounding residue so new finish bonds completely. Go slowly and section by section.
Q: How often should Danish oil be removed and reapplied?
A: Most experts recommend stripping and reapplying every 1-3 years for optimal protection depending on UV exposure and climate conditions. Signs of aging like darkening or residue buildup indicate it’s time regardless of duration.
Q: Can I use household cleaners for removing Danish oil?
A: Stick to natural solvents and strippers formulated for the task to avoid damaging wood fibers or leaving residue that inhibits new seals. Household cleaners aren’t intended for thorough removal.
Q: How can I prevent residue issues in the future?
A: Allow proper curing time between coats, use high-quality brand products, and regularly reapply sealers before breakdown occurs. Good maintenance extends finishes while simplifying future stripping needs.
Hopefully these questions provide confident clarity on common queries. Please reach out if any aspect requires further explanation throughout your journey learning Danish oil removal best practices.
References
For those seeking to expand their knowledgeable mastery of Danish oil removal even further, here are some additional trusted resources referenced in building this comprehensive guide:
- The Family Handyman magazine – Extensive library of step-by-step stripping and refinishing tutorials conducted by expert handymen.
- Fine Woodworking website – Learn techniques from professional craftsmen through firsthand instructional videos and magazine archives.
- Wood Floor Business magazine – In-depth articles on safety compliance, tool evaluations, wood characteristics and eco-certified products.
- The Wood Database – Detailed information on wood types, grain structures, finishing recommendations written by forestry academics.
- Woodworker’s Guild of America – Online forums where seasoned amateurs and professionals trade best practices advice.
- AmericanWoodworker.com – DIY woodworking shows, independent reviews of tools/materials, coding guides for all skill levels.
- EPA/Health Canada – Guidance documents on properly handling, applying and disposing of wood strippers safely.
With access to resources from authorities across amateur to professional domains, confidence emerges from an integrated understanding no single source conveys alone.
Consider this your launching point to further positive expertise.
Don’t hesitate to apply newly acquired mastery and share productive experiences or insights. Collaborative learning benefits all striving for perfection in wood’s renewal. Success arrives through practicing patience and passion for the craft.


: Nature's Finest Wood Finish")
