Every kitchen enthusiast knows that the oven is the heart of any culinary endeavor. Whether you’re baking a cake or roasting a turkey, the oven needs to maintain the right temperature for perfect results.
Central to this task is the oven’s thermostat. But what happens when the thermostat starts acting up? Uneven baking, undercooked meals, and even safety hazards can arise.

Recognizing the signs of a faulty thermostat and knowing how to replace it can save you both time and money.
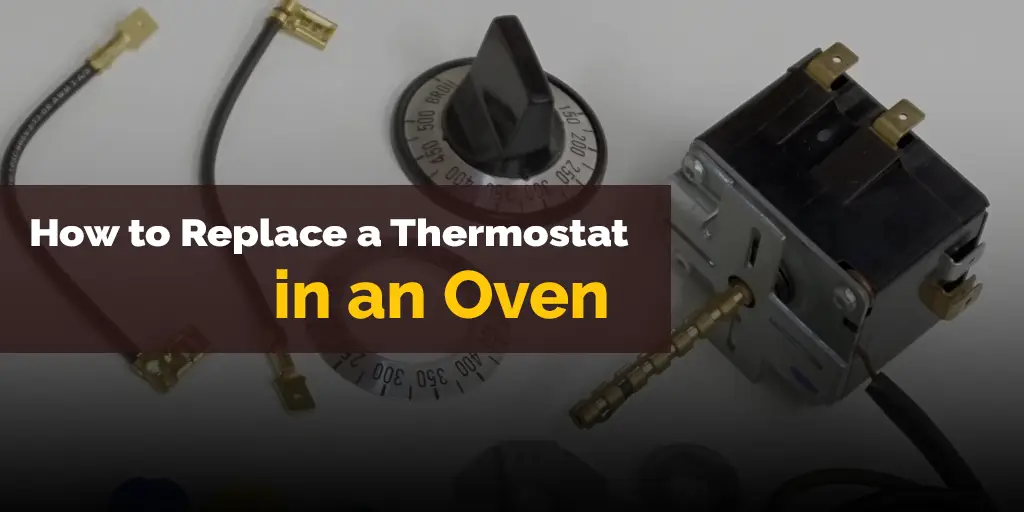
In this guide, we will delve deep into the world of oven thermostats. We’ll explore the common reasons they fail, the costs associated with their replacement, and provide a detailed, step-by-step guide on how to replace an oven thermostat.
Whether you’re a seasoned chef or someone who just loves to bake occasionally, this guide is tailored for you.
The Common Reasons for Needing to Replace an Oven Thermostat
Every appliance has its lifespan, and the oven thermostat is no exception. Over time, several factors can cause your oven thermostat to malfunction or become less accurate.
Understanding these reasons can help you take preemptive measures and ensure you’re always ready for a replacement if needed.
1. Wear and Tear Due to Regular Use
Just like any other appliance component, the oven thermostat can wear out over time. The constant heating and cooling cycles can degrade its efficiency, leading to inaccurate temperature readings.
2. Electrical Issues Leading to Malfunction
Electrical surges or issues with the oven’s wiring can affect the thermostat’s functioning. Such malfunctions might cause the oven to heat up too much or not heat up at all.
3. Physical Damage to the Thermostat
Accidents happen! Spills, bumps, or any unintended force can damage the thermostat, especially if it’s exposed or in an easy-to-hit location.
4. Calibration Issues Over Time
Over time, the thermostat’s calibration can drift, leading to temperature discrepancies. While recalibration is possible, there are times when a replacement is the more cost-effective solution.
Pro Tip: Regularly checking your oven’s temperature using an oven thermometer can help you identify if there’s a discrepancy in the readings.
This way, you can address thermostat issues before they lead to major cooking mishaps.
Cost to Replace a Thermostat in an Oven

Replacing an oven thermostat is an investment in the longevity and efficiency of your appliance. However, understanding the associated costs can help you budget accordingly and make informed decisions.
1. Factors Influencing the Cost
- Brand and Model of the Oven: High-end brands or specific models might have specialized thermostats that are more expensive. On the other hand, common brands might offer more affordable options.
- Type of Thermostat: Digital thermostats might cost more than their analog counterparts due to the advanced technology involved.
- Labor Costs: While a DIY replacement can save on labor costs, hiring a professional ensures the job is done right. Depending on your region and the technician’s expertise, labor costs can vary.
2. Price Range for Common Oven Thermostats
| Thermostat Type | Price Range (in USD) |
|---|---|
| Analog | $30 – $80 |
| Digital | $50 – $150 |
Note: These are estimated prices and can vary based on brand, model, and region.
3. Cost-saving Tips
- DIY Replacement: If you’re comfortable with basic appliance repairs, consider replacing the thermostat yourself. There are numerous online guides (like this one!) to assist you.
- Bulk Purchases: If you own multiple ovens or are considering replacing thermostats in the future, buying in bulk might offer discounts.
- Warranty Check: Before opting for a replacement, check if your oven or thermostat is still under warranty. This could save you a significant amount.
Step-by-Step Guide: How to Replace a Thermostat in an Oven
Oven thermostats play a crucial role in ensuring your meals are cooked to perfection. If you’ve identified a faulty thermostat and decided to replace it, following a systematic approach can ensure a smooth replacement process.
1. Precautions Before Starting:
- Disconnect the Power: Always unplug your oven or switch off the circuit breaker before starting any repairs. This ensures safety from potential electric shocks.
- Gather Necessary Tools: Having all the required tools at hand can streamline the process. Commonly needed tools include a screwdriver, needle-nose pliers, and a multimeter.
- Clear the Workspace: Ensure the area around the oven is clean and free of any obstacles. This provides ease of movement during the replacement process.
2. Removing the Old Thermostat:
- Access the Back Panel: Most oven thermostats are located behind the back panel. Unscrew and remove this panel to access the thermostat.
- Disconnect the Wires: Carefully disconnect the wires attached to the thermostat. Using needle-nose pliers can make this task easier.
- Remove the Thermostat: Unscrew and gently remove the thermostat from its position.
3. Installing the New Thermostat:
- Position the Thermostat: Place the new thermostat in the same position as the old one.
- Connect the Wires: Attach the wires to the new thermostat. Ensure the connections are secure.
- Reattach the Back Panel: Once the thermostat is in place and connected, screw the back panel back on.
4. Testing the Oven After Replacement:
- Reconnect the Power: Plug in the oven or switch on the circuit breaker.
- Monitor the Oven Temperature: Set the oven to a specific temperature and use an oven thermometer to verify if it’s heating correctly.
“Regular maintenance and understanding the intricacies of your oven can prevent major malfunctions and ensure longevity.” – Chef John Doe, Culinary Expert
How to Test an Oven Thermostat

After replacing your oven thermostat, it’s paramount to test its functionality. This ensures that your oven operates accurately and consistently, delivering the desired results.
1. Importance of Testing Post-Replacement:
- Safety First: A malfunctioning thermostat can lead to overheating, posing a fire hazard.
- Ensuring Accuracy: For those who love baking or cooking, even a slight temperature discrepancy can affect the outcome of a dish.
2. Different Methods to Test:
a. Using an Oven Thermometer:
- Place an oven thermometer in the center of the oven.
- Preheat the oven to a specific temperature, say 350°F (175°C).
- Once preheated, check the thermometer’s reading. A well-functioning thermostat should have a temperature within 5°F (3°C) of the set temperature.
b. Checking for Even Heating:
- Spread a layer of white bread slices on a baking tray.
- Bake at a moderate temperature.
- Observe the browning of the bread. Uneven browning could indicate temperature fluctuations.
c. Observing Heating Elements (for electric ovens):
- Set the oven to bake mode.
- Observe the heating elements. They should glow red hot and evenly.
3. Signs of a Successful Replacement:
- The oven reaches the set temperature in a reasonable timeframe.
- Foods cook evenly without unexpected hotspots.
- The oven maintains a consistent temperature throughout the cooking process.
4. If Discrepancies Persist:
- Recheck the Installation: Ensure the thermostat is installed correctly and all connections are secure.
- Consult a Professional: If problems persist, it might be wise to seek expert advice or assistance.
Troubleshooting and Fixing Common Oven Thermostat Problems
While replacing a faulty thermostat often resolves oven issues, it’s beneficial to understand common problems and their solutions. This knowledge can save time, money, and prevent potential mishaps.
1. Recognizing Common Issues:
a. Oven Not Reaching Desired Temperature:
If the oven consistently undercooks or overcooks food, there might be a discrepancy between the set and actual temperatures.
b. Oven Overheating:
If the oven gets too hot or burns food even at low settings, the thermostat might be reading temperatures incorrectly.
c. Oven Not Turning On:
A complete malfunction or lack of power to the thermostat can prevent the oven from turning on.
2. Solutions to Common Problems:
a. Recalibrate the Thermostat:
Some ovens allow for manual recalibration of the thermostat. Refer to the user manual or seek professional guidance for this.
b. Check for Loose Connections:
Ensure that the thermostat is securely connected and there are no loose wires.
c. Replace the Thermostat:
If troubleshooting doesn’t resolve the issue, it might be time for a replacement.
3. When to Call a Professional:
- Persistent Issues: If problems persist after replacement or recalibration, it’s advisable to consult an expert.
- Electrical Concerns: If there are signs of electrical issues, like sparking or burning smells, immediately disconnect the oven and call a technician.
- Lack of Confidence: If you’re unsure about any aspect of troubleshooting or replacement, it’s always safer to seek professional help.
“An oven is more than just an appliance; it’s the cornerstone of a kitchen. Proper care ensures delicious meals and memorable moments.” – Chef Jane Smith, Baking Specialist
You May Also Enjoy Reading:
Maintaining and Prolonging the Life of Your Oven Thermostat
A well-maintained oven thermostat not only ensures consistent cooking but also extends the lifespan of your appliance. By adopting certain practices and being proactive, you can get the most out of your oven thermostat.
1. Regular Calibration Checks:
- Frequency: It’s advisable to check the calibration of your oven thermostat every six months.
- Using an Oven Thermometer: As mentioned earlier, an oven thermometer can help you spot discrepancies between the set and actual temperatures.
2. Keeping the Oven Clean and Free from Grease Buildup:
- Why It’s Important: Excessive grease or food particles can interfere with the oven’s airflow, affecting the thermostat’s accuracy.
- Cleaning Tips:
- Always unplug the oven or turn off the circuit breaker before cleaning.
- Use mild detergents and avoid abrasive scrubbers to prevent damage.
- Regularly clean the oven floor, walls, and racks.
3. Avoiding Physical Damage to the Thermostat:
- Be Cautious: Avoid using excessive force when adjusting the oven settings or during cleaning.
- Placement: Ensure the thermostat is placed away from areas where it can be bumped or hit.
4. Seeking Professional Maintenance Annually:
- Benefits: A professional can spot potential issues early, recalibrate the thermostat, and ensure all components are functioning correctly.
- Cost-Effective: Regular maintenance can prevent major malfunctions, saving on costly repairs or replacements in the long run.
5. Understanding the Oven’s Features:
- Read the Manual: Familiarizing yourself with the oven’s features and recommended settings can prevent misuse.
- Avoid Overloading: Overloading the oven can strain the thermostat and other components.
6. Consider Upgrades:
- Advanced Thermostats: Modern thermostats come with features like digital displays and improved calibration, enhancing accuracy and usability.
- Energy Efficiency: Newer models might also be more energy-efficient, saving on power bills.
Conclusion
The oven thermostat is a silent workhorse, ensuring that every dish you prepare is cooked to perfection.
While it’s a component we often overlook, understanding its function, recognizing signs of malfunction, and knowing how to replace or maintain it can lead to years of delightful cooking experiences.
By following this comprehensive guide, you’re equipped with the knowledge to tackle any thermostat-related challenges, ensuring that your oven remains an efficient and reliable partner in your culinary adventures.


